 In the olden days, your puter had a BIOS.
Nowadays, the BIOS is rapidly giving way to UEFI, which provides all kinds of benefits.
At the same time, hard drives have sort of evolved, so now we’re supposed to use GPT instead of MBR.
Well, okay… First of all, what does all that mean?
And second, how on earth do you convert your MBR drive to the new GPT format without having to reinstall Windows?
It turns out Microsoft has made the process really easy!
First thing’s first
First of all, thanks go to Wingwong for shooting me an e-mail and letting me know about mbr2gpt.
I hadn’t heard anything about it, which is pretty weird considering how awesome it is.
So, thanks WW!
UEFI vs BIOS
Okay, what’s this UEFI and BIOS stuff?
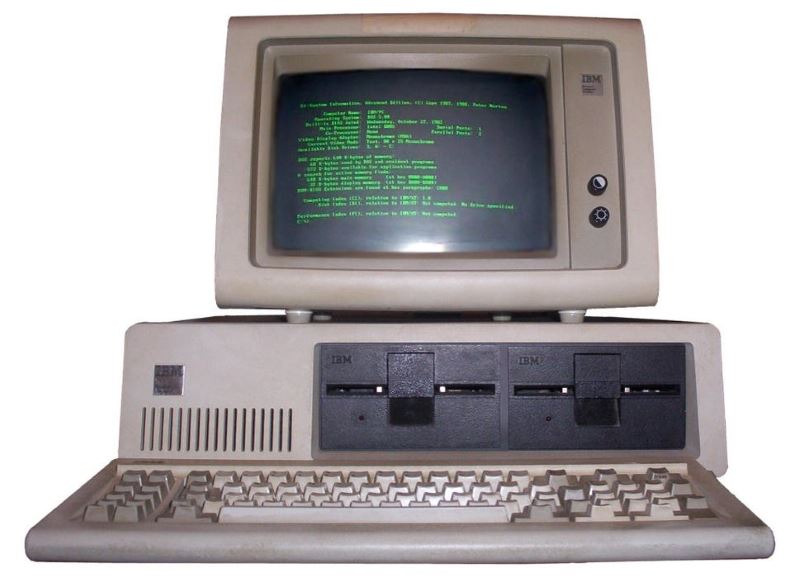
The Basic Input Output System, or BIOS, is firmware that sits in a chip on your motherboard. When you power your puter on, it does all kinds of exciting things.
The BIOS looks at all the hardware in your puter, allocates memory to different devices, and more or less sets up all the hardware to work nicely together.
Once done, it then looks for an operating system to boot, starts it, and then takes a back seat. Voila! Windows loads.
UEFI, or Unified Extensible Firmware Interface, is like a new version of the BIOS that does more stuff – and better. UEFI has all kinds of new toys, like:
- A fancy graphical configuration interface
- Faster boot, standby, and resume times
- Secure boot
- Modular and flexible design for future-proofness
- Support for ginormous hard drives with GPT
In short, UEFI is the future of computers – at least when they boot up. Chances are, if your puter is only a few years old, it probably already has UEFI instead of the traditional and outdated BIOS.
MBR vs GPT
 Note the last item above: UEFI supports huge hard drives as long as the drive is using GPT.
So what’s the difference between MBR and GPT?
Master Boot Record, or MBR, is basically the boot sector on a hard drive that contains a boot loader for the installed operating system and information about the drive’s logical partitions.
The boot loader is a small chunk of code that usually loads a larger boot loader from another partition on the drive. In other words, the Boot Sector has a Boot Loader that tells Windows to fire up.
Well, why change that if it works?
MBR was created way back in 1983. It has several limitations, namely only 4 primary partitions are allowed, and the maximum size for an MBR hard drive is 2TB.
Naturally, something better was needed.
Enter GPT, or the GUID Partition Table!
Just as UEFI is replacing the BIOS, GPT is replacing MBR.
GPT has several advantages:
- Totally enormous hard drive sizes supported (like, REALLY big)
- Redundant boot/partition info is stored on disk, so GPT is “self-healing”
- Totally huge number of partitions are supported – not just 4
- To get those faster boot times with UEFI, you really need UEFI on the motherboard + GPT on your hard drive
Now it gets hairy
So, you’re going to need to know if you have UEFI or an older BIOS.
Frankly, the rest of this article is not for the faint of heart.
You can totally screw stuff up if you’re not careful!
If your puter uses UEFI, the next thing to do is to see if your C: is MBR. You can do that like so:
- Right-click This PC and choose Manage
- Click Disk Management under Storage
- At the bottom, right-click Disk 0, and in the popup menu, see if it says “Convert to GPT Disk“
- If it does, your C: is using MBR. If not, you’re already using GPT!
How to convert from MBR to GPT
In the past, you’d have to reinstall Windows. That’s pretty sucky.
Fortunately, beginning with the Windows 10 Creator’s Update (version 1703), Microsoft decided to include a tool located here:
C:\Windows\System32\mbr2gpt.exe
You can read all about MBR2GPT on Microsoft’s site, and they even have a nice video to watch.
In short, MBR2GPT allows you to convert the boot/partition mojo on your Windows 10 hard drive from MBR to GPT – without reinstalling Windows 10!
Hold your horses!
A few important notes…
You probably noticed the /allowFullOS switch. This allows you to do the conversion from an admin Command Prompt from inside Windows 10.
Microsoft itself recommends against doing this!!
So do I, actually.
The reason is that it’s far safer to modify your Windows drive when the Windows on it isn’t actually running. That’s kind of a no-brainer.
The other reason is that – as far as I can tell – using /allowFullOS means that MBR2GPT won’t be able to re-use your “System Reserved” partition at the beginning of your hard drive. Instead, it will shrink the main data partition of your C: and create a new “system partition” at the end of the drive.
This works fine, but some people have reported that they then have this extra, old System Reserved partition as a new drive letter in Explorer. To me, that seemed like a silly tradeoff.
So, I did things the MS-recommended way: I booted from a Windows 10 PE (Preinstallation Environment) USB stick that I had to make.
Can I instead boot from…
No.
Yes, you could go into Settings and reboot Windows 10 into Recovery Mode, fire up a command prompt, and run MBR2GPT that way.
BUT it’s pretty much the same thing as running it from within Windows itself, since you’re still running the command from a partition on the drive you’re going to be modifying.
I’m not sure, but I think this is why MS recommends using Windows PE to do the deed: because it’s the “sure way” of doing it, and you’re far less likely to run into problems.
How do I get Windows 10 PE so I can boot from it?
 More hairiness!
The short version is to go here and download the Windows ADK and the Windows PE add-on for the ADK Then, you’ll need to follow the instructions in this video.
Note that the above process means you have to download 6.5GB of files, run some commands, and you’ll get a bootable ISO file.
Who wants to do all that? Well, I do! So I did. You can download the ISO below and avoid all the hard work:
Ta-DA! It’s a ZIP file. Just extract the ISO, burn it to a CD or DVD (it’s about 270MB), and boot from it.
Note that this version of the WinPE for Windows 10 also works for versions 2004, and 20H2 through 22H2 of Windows 10!
If you want a bootable USB stick, just use something like Rufus to write the ISO to the stick, and then boot from that.
Do the GPT deed!
Next stop: Boot from your Windows PE CD / DVD / USB stick.
In the command prompt, do this:
- Type: diskpart
- Type: list disk
- Note the Disk # for your C:, which should NOT show an * in the GPT column
- Type: exit
- Type: mbr2gpt /validate /disk:X, where X is the # of the disk you got from diskpart for your C:
- If it validates okay, you’re good to go. If not, stop because there is some problem!
- Type: mbr2gpt /convert /disk:X to do the actual conversion
- Reboot your puter, and if necessary go into UEFI, and change the boot setting from Legacy to UEFI
That’s it!
You can now enjoy extremely huge boot drives and faster boot, standby, and resume times. 😀
By the way, on my Asus motherboard, I didn’t have to change the UEFI boot settings. I already had CSM=Auto and Secure Boot=Other OS, and I’m now running in full UEFI + GPT mode with no config changes. However, for Windows 11, you’ll need to set Secure Boot = Windows UEFI Mode, and then you’ll be all set.
For more info, see: Fix UEFI BIOS boot problems on a new motherboard


That was great! :-O
I’ve already GPT’ed some 3TB drive from scratch, as they won’t load on Windows, and seen the fancy UEFI at work more and more often, but… did you do that on a SSD drive? Wasn’t aware of the partition and speed features of GPT.
Thanks a lot for the detailed tutorial! I’m gonna love that 😉
Yes, it works for SSDs, too. I have 2 drives: SSD is C:, and data drive is a 2TB hybrid. The larger 2TB drive was already GPT since it was easy to just set it to GPT before I copied data over from my old data drive. But my C: was a bit more problematic…
Well, it’s a good idea to make a backup before you mess with your boot drive, but I have crazy backups. So I just pulled the trigger – and poof! It was done. My C: is an NVMe SSD, but it also works on SATA SSDs just fine.
I need help here.
So I got windows 10 at retail 100 bucks. I tried to install it, when it said that my hard drives were MBT and not GPT. I tried again, and the same thing happened. I tried to find new hard drives, but couldn’t tell if the drives on Amazon were MBT or GPT. My hard drives, after some inspection, are MBT. Here is the issue. My pc doesn’t have an operating system yet. It’s a brand new rig I fully assembled about 2 weeks ago. After getting my Windows 10 USB stick, I plugged it in, and it said none of my drives were able to download windows 10 on. So now I’m trying to figure out how to do this without an OS. My system info is:
Motherboard: Gigabyte 970a-ds3p
2 MBT Hard drives, 160gb and 250gb
Any ideas???
It should be much easier than what I wrote in the article. The article instructions are for if you already have Win 10 installed. If you don’t, then the only thing you should have to do is make sure your BIOS/UEFI settings for your motherboard are set to UEFI mode. Win 10 should automatically detect this, and then install itself with GPT.
MBR and GPT are just the type of boot sector + partition tables, which are chosen via Windows.
To check your UEFI setting in your motherboard, when the puter first turns on and you see the Gigabyte boot screen, press the Delete key. That should take you into the BIOS Setup. Select BIOS Features, and then set:
1. Make sure the Boot Option Priorities are set properly. You might want to set USB/DVD as #1 (for Windows install media) and #2 as the hard drive you want to install Win 10 on.
2. OS Type = Windows 8 (‘Other OS’ will work, but I think you need this to set #3 below)
3. CSM Support = Always
4. Boot Mode Selection = UEFI Only (If that doesn’t work, try ‘UEFI and Legacy’)
5. Storage Boot Option Control = UEFI First (not totally sure you need this one, but…)
The idea here is that you’re telling the BIOS to use the newer UEFI boot process, which is needed for GPT – and so that Win10 will install the newer way.
You might need to play with the above settings a bit. I’m not quite sure since I’ve never used a newer Gigabyte motherboard. But that should get you up and running!
Nice write up, good effort, but for unknown reasons my disk didn’t validate. I don’t have time to chase this down another Window’s rabbit hole…
Thanks!
Tried it but because I still had the master boot table & a lager partition on the drive it would not do it.
But because it is a Microsoft tool,, you guessed it,,, it still tried & went ahead with the process and totally stuffed everything up first before telling me there was an issue with the extra partitions.
Lucky I had a Full drive backup
Oh man… Since I switched to using an SSD for my boot drive, I never have multiple partitions on the primary drive. I did that a lot in the past, and I ALWAYS had some problem or another. For example, ages ago, I had 1 HDD with Win XP. Tried to dual-boot with linux. It worked! No problem. Then I decided that linux had to go because wasn’t playing nicely with the Win machines on the network (and vice versa), and I tried to remove those extra partitions without screwing up Windows… HA! I had to buy partitioning software to get ‘er done without losing everything. SIGH…
Thanks for this post. It helped me to enable a 12TB RAID5 array for Windows 10. However once I changed the partition to GPT,, it would not boot the Windows 10 I previously installed as MBR. I found another post that stated to boot from the Windows 10 installation media and get the Windows installation to the point where it’s time to wipe/create partitions.. Then just reboot. Somehow this does a write back to the BIOS to tell it what to boot. Windows 10 booted fine after this procedure.
Thanks for that write up. Windows 11 required secure boot to be enabled to upgrade and I was, of course, in MBR mode. Used that tip on bootable USB and booted direct to command prompt and ran all the commands you listed. Went in and Disabled CSM, rebooted, Enabled Secure Boot, rebooted and went into my OS just like before… Kudos..
I was cringing at the thought of reinstalling the OS as every time I do I lose something…
I am on developer builds and whenever there was an issue there was a utility that popped up to report my issues and that was lost after one reinstall. No one could figure out how to enable it again, so now can get back in dev channel and test 11 out, thanks…
Thanks so much for such a clear and detailed explanation of what Microsoft made so complex. You saved me hours.
Fantastic, eloquent and superbly helpful. 5 Stars
It‘s not hairy at all and a clean and easy straight forward process.
I bought a GIGABYTE Z690 Gaming X board with a i5 12600K. My older Corsair SSD was recognised by the BIOS but not bootable, no matter what setting I chose.
So I put the SSD in an older PC with Windows 10 running and there it was, the SSD. I read the article on Microsofts page and followed simply step by step.
https://docs.microsoft.com/en-us/windows/deployment/mbr-to-gpt
As the drive to be converted can be selected, the original Windows installation on the old computer was still untouched. I removed the SSD and put it back into the main and the BIOS immediately recognised the drive as „bootable“ and next thing was Windows 10 starting.
It created an additional invisible 100MB EFI partition and another 100MB System Reserved partition, which I simply hide.
Worked like a charm. ✌️😎✌️
Multiple tries and still mo luck going to GPT. I am working on two clones of my WIN10 system drive that I have failed to convert and had to re-clone 4 times.
I have tried a partition program, MBR2GPT /allowfullOS, and a few changes to partition sizes.
Your site had exactly what I was looking for MBR2GPT on WINPE, but the result was the same:
“Cannot create EFI system partition. Error: 0x000036b7”
The system partition is empty and unbootable. I have tried increasing the system reserved partition, adding an unallocated space between the system partition and the C: partition, adding a unallocated space between the C: partition and the recovery partition, and deleting the recovery partition. My last try was with just the original 502M system reserves and 237 G C:boot partitions, with the recovery partition deleted.
Any idea on what I am doing wrong?
Hmm, that’s a pickle… Can you actually boot the cloned drive without converting to GPT? That must work before you can convert. Only other things I know of are that you must:
1. Have 64-bit windows
2. Have a working/active system partition
3. Not have any dual-boot nonsense
4. Not have any extended partitions
Some people also say more than 3 partitions can cause issues, and ‘screwed up’ partitions can do it – but what exactly the definition of a ‘screwed up’ partition is, I dunno. Was thinking maybe the cloning process screws up one or more partitions? Maybe…
1. I have 64-bit windows
2. The cloned drive was working/active system partition that booted without any problems prior to the attempted convertion.
3. I do not have any dual-boot nonsense
4. I have no extended partitions, just the system reserved and C: boot
I am Lungisani, i just wanted to say i am super happy abut the help i got from this page, i am in South Africa.. & i work in technical support and your content is amazing keep it up.