 The Windows 10 “April 2018 Update” version 1803 was released a few weeks ago… in May, not April.
Go figure.
Initially, there were some serious problems with 1803, but those seem to have been ironed out now.
Chances are, if you don’t have it already, you’ll be getting it soon.
Given my past articles on improving the privacy and security of Windows 10, what do you need to know about this new 1803 version of Windows 10?
Privacy: Not too bad this time around…
After updating to Win 10 1803, once again I went through all the privacy settings mentioned in the linked article(s) above.
Whereas 1709 didn’t have any Settings to change, this new version does have a few bits and bobs to fix if you’re “paranoid” like me. 😉
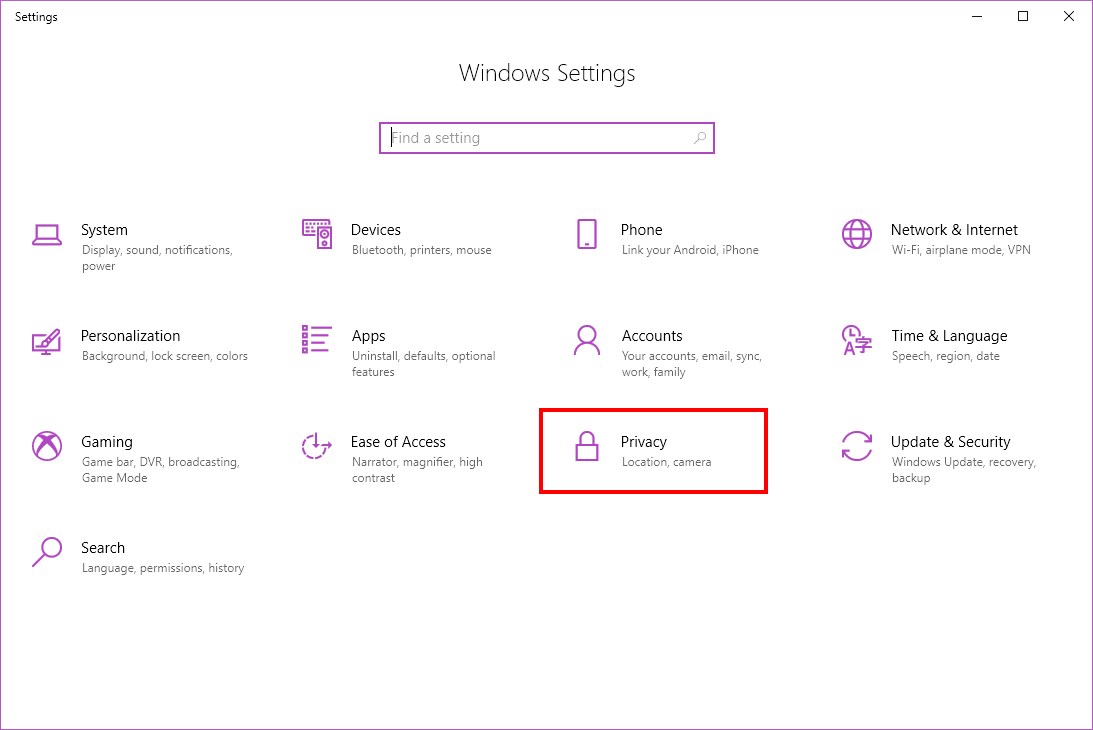
So first, click Start, and then Settings (the gear icon).
Then, click Privacy:
Then click Activity history in the left column.
Activity History is a potentially useful new feature in 1803. You can access it by clicking this new icon near the Start button:

Activity History pops up an overview of all your open windows as well as a scrollable “Timeline View” of recent documents and web sites you’ve viewed. By scrolling up or down, you can go backwards or forwards in time.
Sounds neato, right?
Well, I suppose it could be handy… Only one problem: I use Firefox and Chrome for web browsing, and it only shows me web pages I’ve visited recently in Microsoft’s own Edge web browser.
So, there isn’t really full support yet for all the applications you probably have.
In time, the feature may become more useful, so I personally have left it enabled for now.
Anyway, back to the Activity History settings:
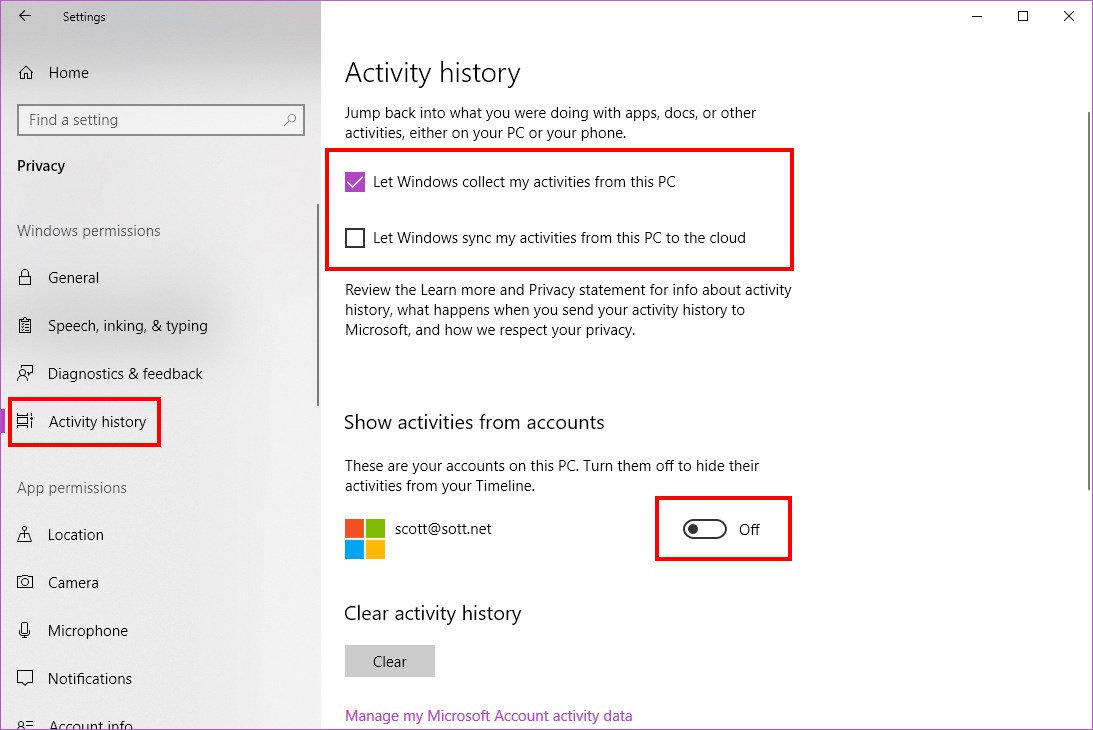
You can turn it on or off, and also change whether or not you want activities synced to the cloud (I said NO). I also disabled “Show activities from accounts”. The only clouds I like are the kind that produce rain.
Next, scroll down and click Contacts in the left-hand column. For the following settings, you probably just want to turn access OFF:

Next up is Documents:

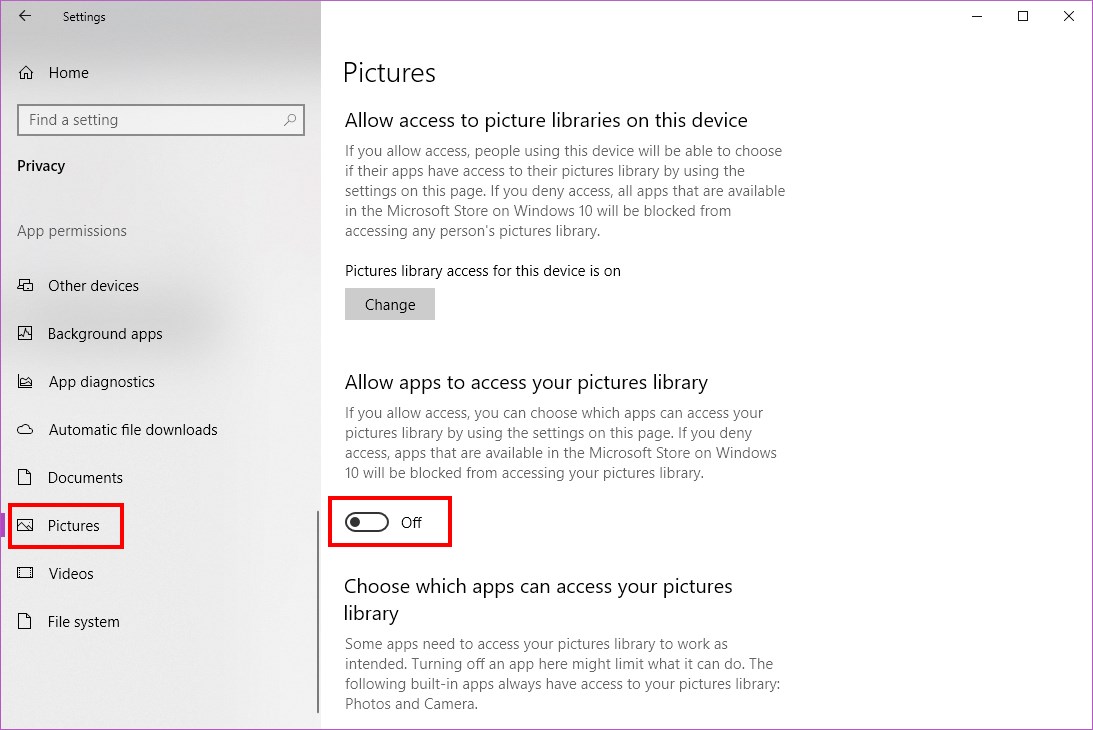
Next up: Pictures
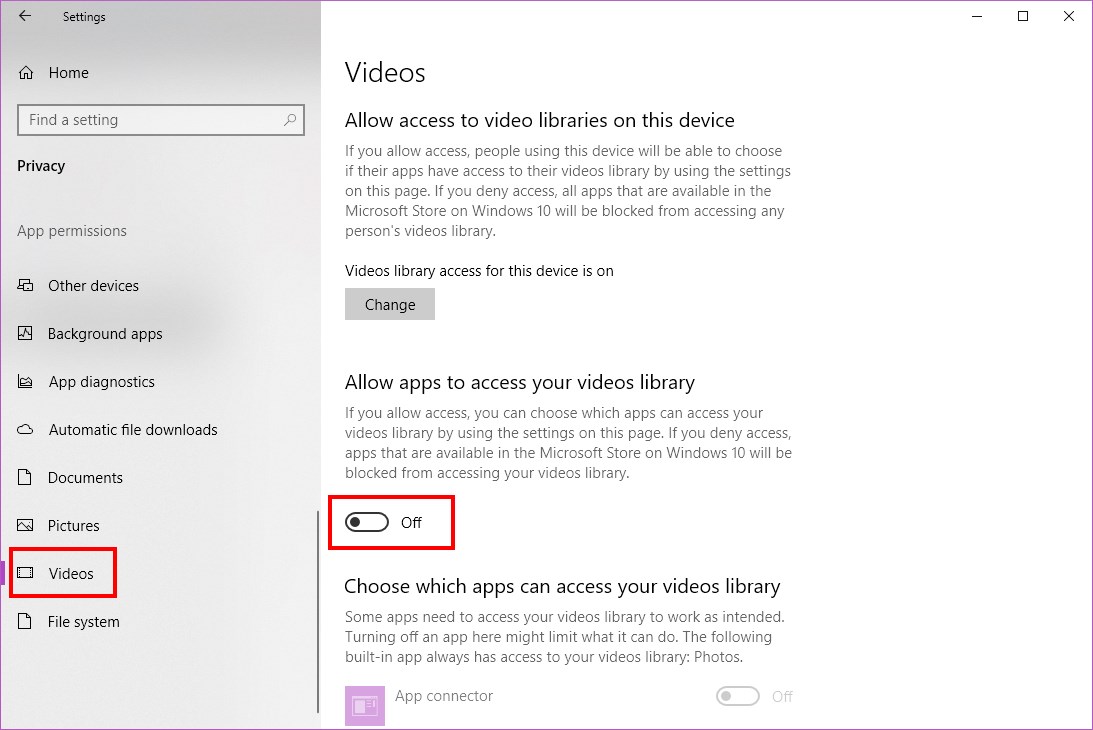
And the Videos:
And finally, File system:

Note that for each of these settings, you are NOT preventing normal applications like Word from accessing your Documents, etc. These are the “phone-like” settings for “Apps” that are just not needed for most people who use their puter just like they did back in the days of Windows 7.
BUT…
If your mic and webcam stop working in Skype, for example, click the Camera and Microphone options in the left column and enable Allow apps to access your microphone (or camera).
Then, under Choose which apps can access your microphone/camera, enable them both for Skype and any other apps.
It appears that in some cases, this is causing Skype to “not work” for people with 1803. Sometimes…
Turn off Telemetry – Again
Once again, you need to turn off the Connected User Experiences and Telemetry service.
It’s pretty easy, and you can see my instructions here:
How to disable telemetry and improve your privacy in Windows – again
That wasn’t so bad…
Superfetch is back on by default – Again
If you have a super-fast SSD in your puter, you don’t need Windows’ Superfetch service.
Turn Superfetch off like so:
- Click Start
- Type: services
- Scroll down and double-click on Superfetch
- Click the Stop button
- Set “Startup type:” to Disabled
- Click OK, and close the Services window
SuperFetch, which is a Windows feature that preloads programs into memory so they start up faster, is now disabled. With an SSD, it is generally recommended to turn SuperFetch OFF, as it doesn’t really do much good with the super-duper read speeds that SSDs give you.
One of these days, M$ will stop re-enabling this for puters with SSDs… Probably in 2034 when we have all switched from SSDs to “Optical Neuron Drives” or something.
Bye-bye Homegroups, Hello Share!
First, we had Crappy File Sharing.
Then, we had Homegroups.
Well, now we have neither. Except we do. No wait, we don’t.
WhatEVER!
All you need to know is how to share files (again).
Since Homegroups are now gone, you can share a folder with other users on your local network using the Share tab in Explorer.
First, open Explorer and select the folder you want to share:
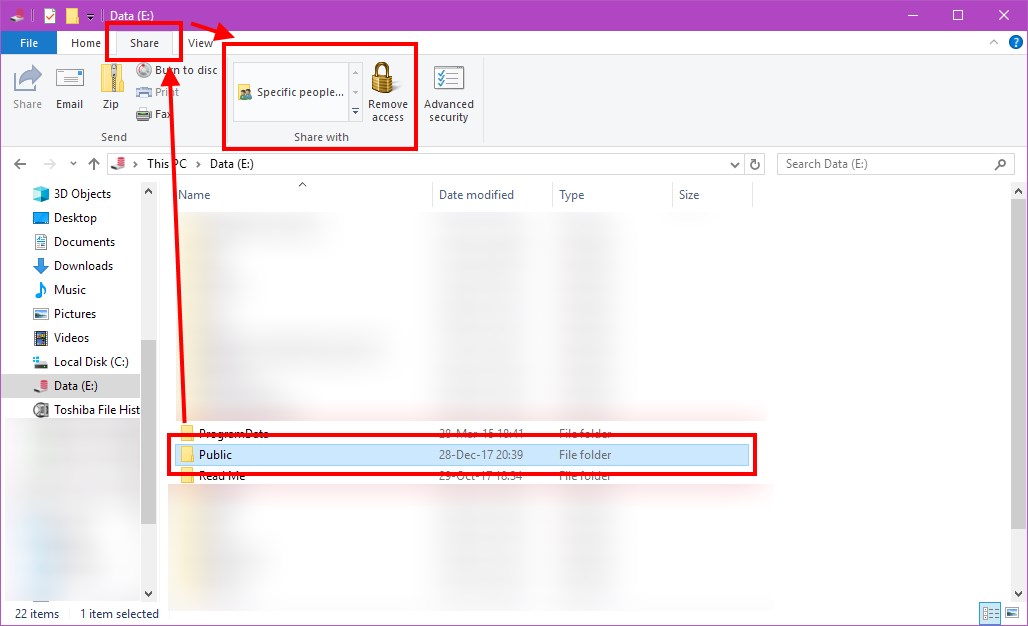
Then, as marked above, click the Share tab.
If the folder is already shared, you can click the Remove access (padlock) icon to stop sharing the folder.
Or, click the Specific people… box to bring up the sharing dialog:

If the user you want to share files with or Everyone is not displayed, just click the drop-down menu and select Everyone (or the user) and then click the Add button.

Then under Permission Level for Everyone (or your specific user), choose the permissions you want. I usually just share my Public folder, and pick Read/Write for Everyone.
Done! Well, sort of…
You see, Windows 10 1803 still has this fun little problem of randomly sharing your entire C:\Users folder (sometimes) as well as individual folders like My Music (i.e. C:\Users\Scottie\Music).
So if you see those extra folders shared, you’ll want to stop sharing them.
Well, I suppose this is progress, because Homegroups were very annoying and buggy.
It’s just that… well… You’d think after several DECADES of file sharing, Microsoft could get it right for once.
Aaaaand you’d be wrong. YAY!
And finally… Windows 10 N Media Feature Pack
![]() If you have the Euro “N” version of Windows that doesn’t come with Media Player, you can already download the feature pack here:
If you have the Euro “N” version of Windows that doesn’t come with Media Player, you can already download the feature pack here:
Media Feature Pack for Windows 10 N (October 2017)
Just scroll down and select the Version 1803 edition to download and install the Feature Pack.
That was easy.
That’s it
So yeah, not too bad.
We’ll see how useful this new Timeline / Activity History feature is in the longrun…

Great update!
I’ve been a “free” user for years. Going “pro” today (thanks in large part to your updates).
Bravo!
Thanks for the review!
Beware the 1803 version on older machines… I’d compare that to the very first release, free-update-for-all, of Win10: You install the update, and sayonara to your VGA driver. Puff! Black screen!
Any attempt at blocking the automatic updates gets really really annoying :O