 If you have an 11th generation or newer Intel processor, your system might be using Intel VMD.
VMD, or Volume Management Device, is a server-ish bit of technology where your processor more or less “hijacks” the management of NVMe disk drives in your puter.
When VMD is enabled, you MUST use Intel’s RST drivers – even just to do a clean install of Windows 11.
Well, what happens if you got your puter and it’s using VMD, but you want to remove it?
Easy!
If you’re like me…
I was an early adopter of Intel’s 12th-gen processors. I got my shiny new motherboard, fired everything up, and I enabled Intel VMD because… well, why not?
I couldn’t find much about it, and it looked harmless enough.
Then, a few months later while building some new PCs, I wrote this article:
NVMe drive missing or not booting? There’s a simple fix!
Much to my dismay, I noted that on my own puter, VMD was enabled! EEK!
Wait, why do I care?!
Well, first of all, if you have a Samsung NVMe M.2 drive, sometimes you won’t be able to use Samsung Magician to update your drive’s firmware.
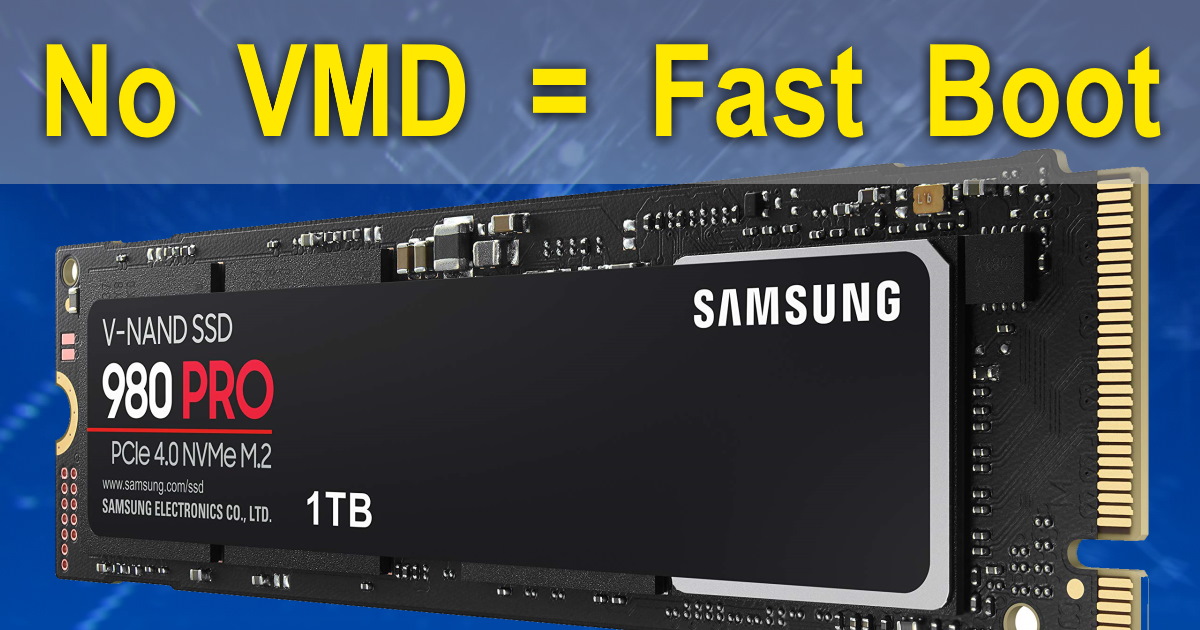
But more importantly, there is this idea floating around that using VMD makes your drive faster. That’s simply not true in my case.
In fact, with my Samsung 980 Pro, the drive is just as fast as before. What’s more, the time spent watching the “spinny loader” as Windows fires up went from 6 seconds with VMD to 3 seconds without VMD!
In other words, my Windows startup actually became 2X faster simply by disabling VMD!!!
How to turn off VMD
It’s pretty straightforward.
First, create a System Restore point just to be safe in case anything goes wrong. To do that:
- Click the Start button
- Type: system restore
- Click: Create a restore point
When that’s done, carry on.
Next you’re going to remove the Intel VMD devices listed in Device Manager. You are NOT going to delete the drivers! If something goes wrong, you’ll need to revert your BIOS/UEFI back to VMD, so you may need them.
So, first, click Start and type: Device Manager
Open Device Manager, and scroll down to find Storage controllers:
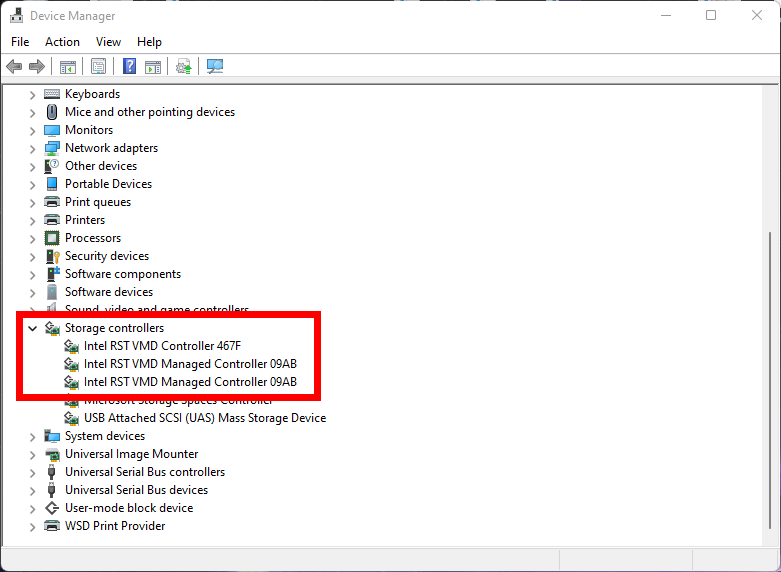
If VMD is enabled, you should see several Intel RST VMD… entries.
For each VMD entry, you must:
- Right-click it and choose Uninstall device
- In the popup window, make sure Attempt to remove drivers… is NOT checked!
- Click Uninstall button
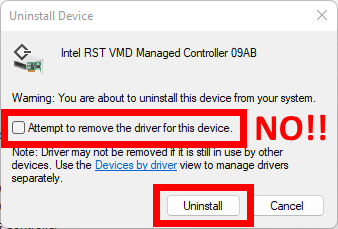
Repeat for any other RST VMD entries…
It will tell you to reboot, but DO NOT REBOOT yet!
Now the fun part: Enable Safe Mode
- Click Start
- Type: startup options
- Click: Change advanced startup options
- Under Advanced Startup, click the Restart now button
Your puter will reboot.
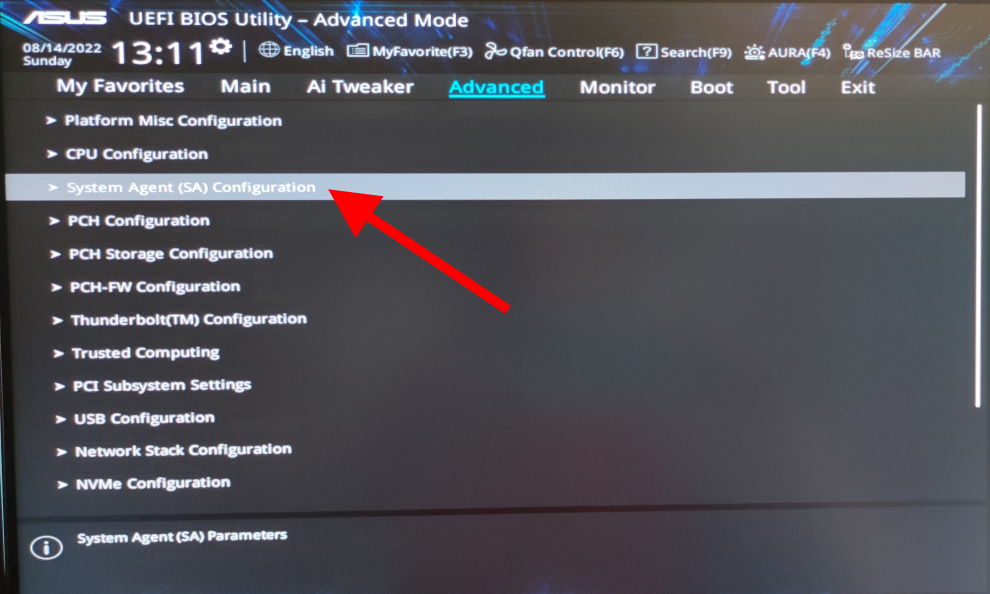
At this point, you need to go into your BIOS/UEFI and disable VMD.
How exactly to get into the BIOS depends on your motherboard, but usually (before Windows boots) you tap either the Del or the F2 key.
Then, once in the UEFI config, you’ll need to find and turn off VMD. That also depends on the motherboard maker, but the following is how to find the setting on most Asus motherboards from the Advanced menu:

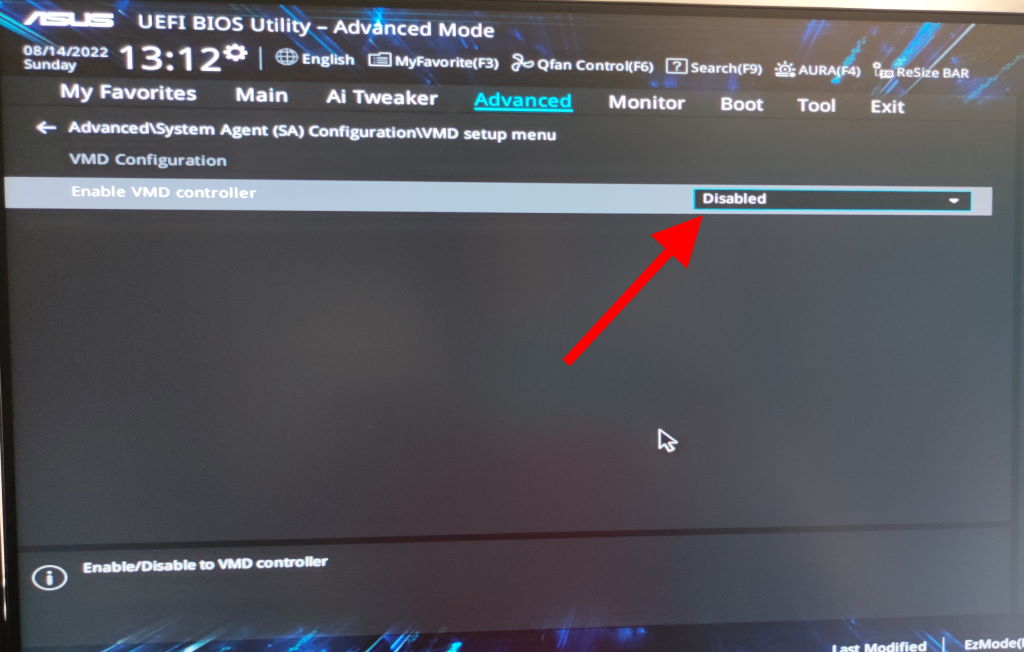
Right. Now, save and exit so that your puter boots again…
Once the puter boots, you’ll see the Choose an option screen:
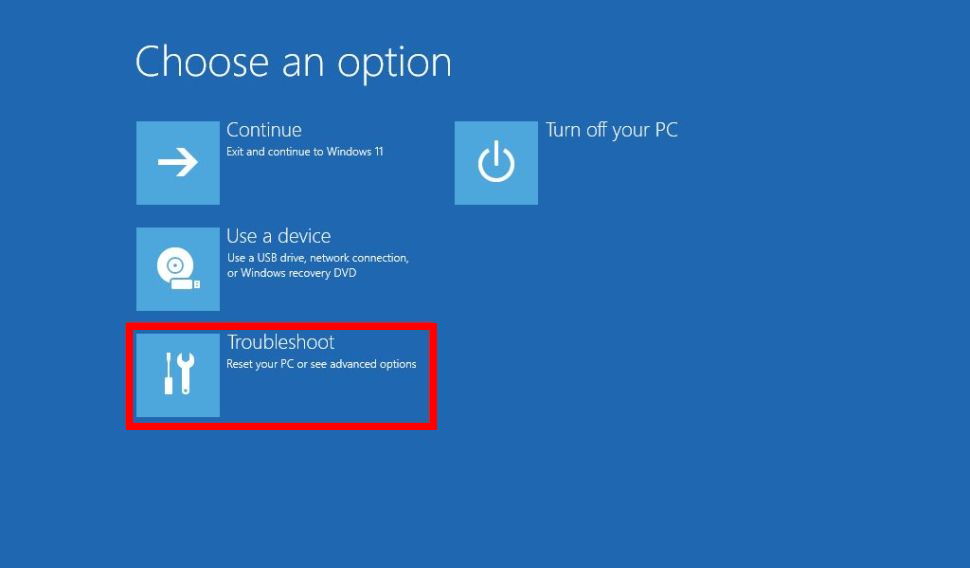
Click Troubleshoot, which will show you more options:

Choose Startup Settings, and then you’ll see this screen:
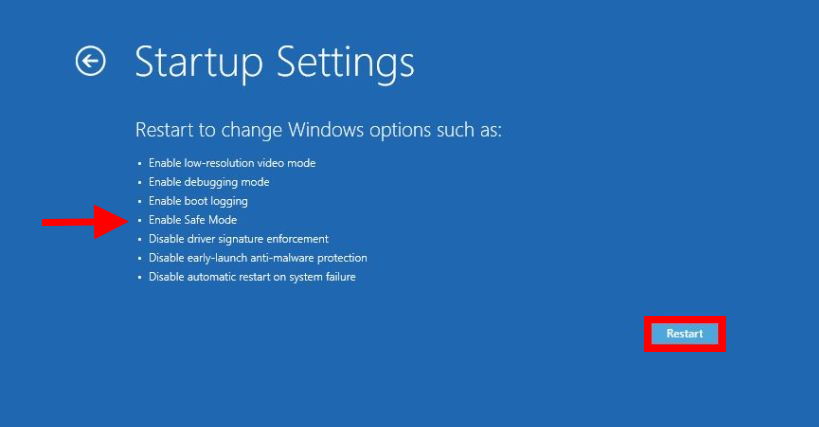
Yes, you’ll now click the Restart button during this needlessly complex series of operations just to boot into Safe Mode!
Your computer will reboot AGAIN, and this time you’ll see this screen:
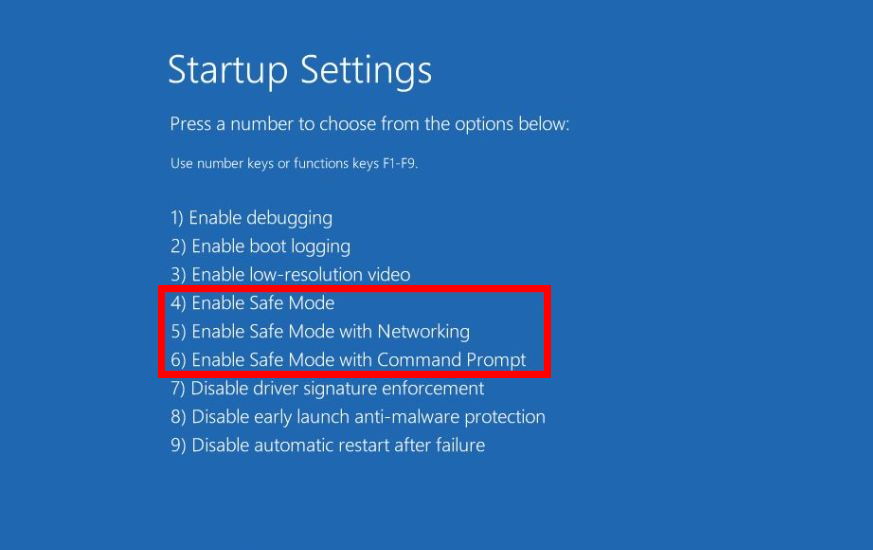
You’ll need to pick a Safe Mode option. Just tap the 4 key on your keyboard.
Windows will – finally – boot into Safe Mode!
Once you’ve safely booted up, just restart the puter again. Windows should boot normally.
If you look in Device Manager again, you should see:

Ta-DA! You are now using the Standard NVM Express Controller.
Exciting Conclusion
So, yeah… Do yourself a favor and turn off VMD. And then the next time you upgrade your boot drive or move it to a new system, you won’t have any “drive not found” errors to deal with.
And if you need a fast NVMe drive, check out the Samsung 980 Pro 1TB on Amazon (affiliate links):


I’ll keep this in mind for my new PC build. At this moment my intention is to use AMD Ryzen, rather than Intel.
What are your thoughts?
The Ryzen processors are quite good! But you won’t have to worry about VMD since that’s an Intel thing.
I panicked for a second when I wanted to disable intel rapid storage. I hate this program now. Thank you so much!
I have a HP Laptop 15-dw3024nia, The problem is that to boot other software like Acronis to backup the drives, there is no option to reload the SSD driver file for detection. (IRST)
If possible, guide me how to inject the internal hard drive of such devices for all bootable programs.
The only case I can think of where that should matter is if your software (like Acronis) creates a bootable USB stick for you, for example. In that case, re-running the ‘make bootable recovery’ process should do the trick. Otherwise, turning OFF VMD should make everything more compatible, not less.
Well, I suppose the other thing I can think of is if your lappy manufacturer included some kind of custom bootloader for Windows/recovery. In that case, you’d have to do battle with that bootloader… which is why I never get computers where they do silly things like that. I had one like that years ago, and it was a PITA to remove it! I had to replace the HDD with a fresh one, turn off their nonsense in the BIOS, and do a clean install of Windows. That was fun.
My laptop is model (HP 15-dw3024nia) and it does not have the ability to disable VMD Controller in the Bios!
The only way is to make it bootable with Acronis software and add the drivers to the bootable USB. (Of course, not all bootable programs have this capability)
OH… 🙁 Well, in that case, I guess you’re kinda stuck with it.
THANK YOU!!! This has eliminated 30+ second freezes at boot for me on my otherwise very fast new ASUS laptop.
Hello, I followed your guide and it is working marvelous!
Do you how do I re-enable VMD back?
You just reverse the procedure. Since the Intel RST drivers are still there, your puter should boot up and use them again.
Hello.
On my Acer A-515-56G it’s not possible to revert to VMD back, even though I didn’t erase the drivers. If I change the configuration in BIOS, the system doesn’t boot up, even in safe mode.
Any hint on how to push the laptop to use the RST VMD during the boot?
Hmm… Well, isn’t that a daisy? I haven’t actually tried to re-enable VMD on my puter. I did read that one guy had to re-install the RST drivers from within safe mode. You could also try manually selecting the RST drivers in Device Manager (instead of the Standard NVMe ones).
Thanks Scottie, it worked as you discribed, exactly. I don’t know why it has to be such a convoluted process in order to uninstall the (bleh and under performing) Intel RST drivers but this stuff worked.
Thx for doing this great job. Eventually I was able to update the crapy firmware on my 980 pro with Samsung magician
Thank you for this! I was about to completely install Windows just to remove VMD but this was so much easier.
Excellent guide, thank you so much! This saved me from having to wipe the manufacturer’s image on my HP Z2 Mini G9 workstation.
Thanks man. Could not update Samsung 990 PRO firmware because of VMD and this guide helped me get rid of it! Can confirm that boot is lot faster now too.
Thank you! You rock! I could not update tyhe firmware on my Samsung 990 Pro until I found and did this. Worked like a charm.
Thank you for this, been trying to figure out how to dual boot my windows laptop for a week and this was the last bit I needed to get that working