 You’ve tried everything: Task Manager, Startup Apps in Settings, even uninstalling some applications…
Nevertheless, that pesky app is still firing up every time you restart your Windows puter.
Wouldn’t it be nice if there was an EASY way to see all your startup apps and disable them in a few clicks?
There is! And it’s made by none other than Microsoft…
Did you say Microsoft?
Yup! The company that brought you startup apps and eternally borked updates in Window 10 and 11 also made a handy tool to control startup apps.
And then they made it Top Secret so you’d never know it existed!
Nice.
Behold Autoruns for Windows!
Just go to the Autoruns page, and click the download link.
You’ll end up with the file Autoruns.zip in your Downloads folder.
Double-click the ZIP file and extract it.
If you want to know all about it, open the autoruns.chm help file. In the help file, we read:
This utility, which has the most comprehensive knowledge of auto-starting locations of any startup monitor, shows you what programs are configured to run during system bootup or login, and what extension load into various Windows processes, including Explorer and Internet Explorer. It reports the image timestamp of executables, the last-modified timestamp of other file types, and the last-modified timestamp of the autostart locations. A “Hide Signed Microsoft Entries” option helps you to zoom in on third-party auto-starting images that have been added to your system.
Well, hot damn! What a concept.
Now, to make life easier, you can copy the extracted Autoruns folder wherever you want. I choose the C:\Windows directory because, well, why not.
Then, I navigated to C:\Windows\Autoruns, right-clicked the file Autoruns64.exe, and chose Pin to Start.
Ta-DA! Now I have a handy link to run it whenever I want.
Note that there is no “installer”. You just pick the version that works on your puter (32-bit vs 64-bit). For most people, that’s Autoruns64.exe.
Fire it up!
Now, run Autoruns from your new shortcut. You’ll see something like this:
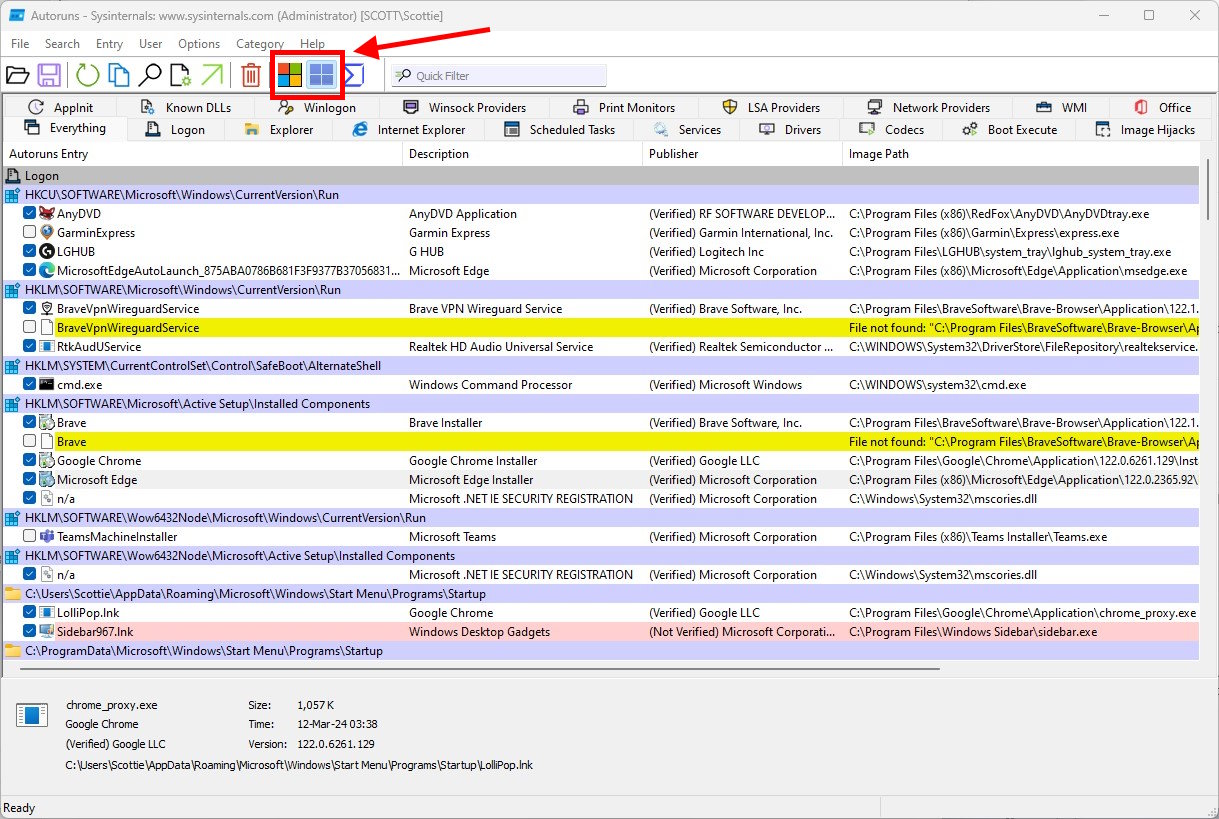
Note that by default, you’re being shown all non-Windows startup processes. In the red box in the image above, you can see the Windows logo button is selected.
If you want, you can click the MS logo, and that will hide all Microsoft processes – so you don’t disable or delete something you’re not supposed to!
I find the default is generally fine, though.
Next, you may notice some entries highlighted in yellow:
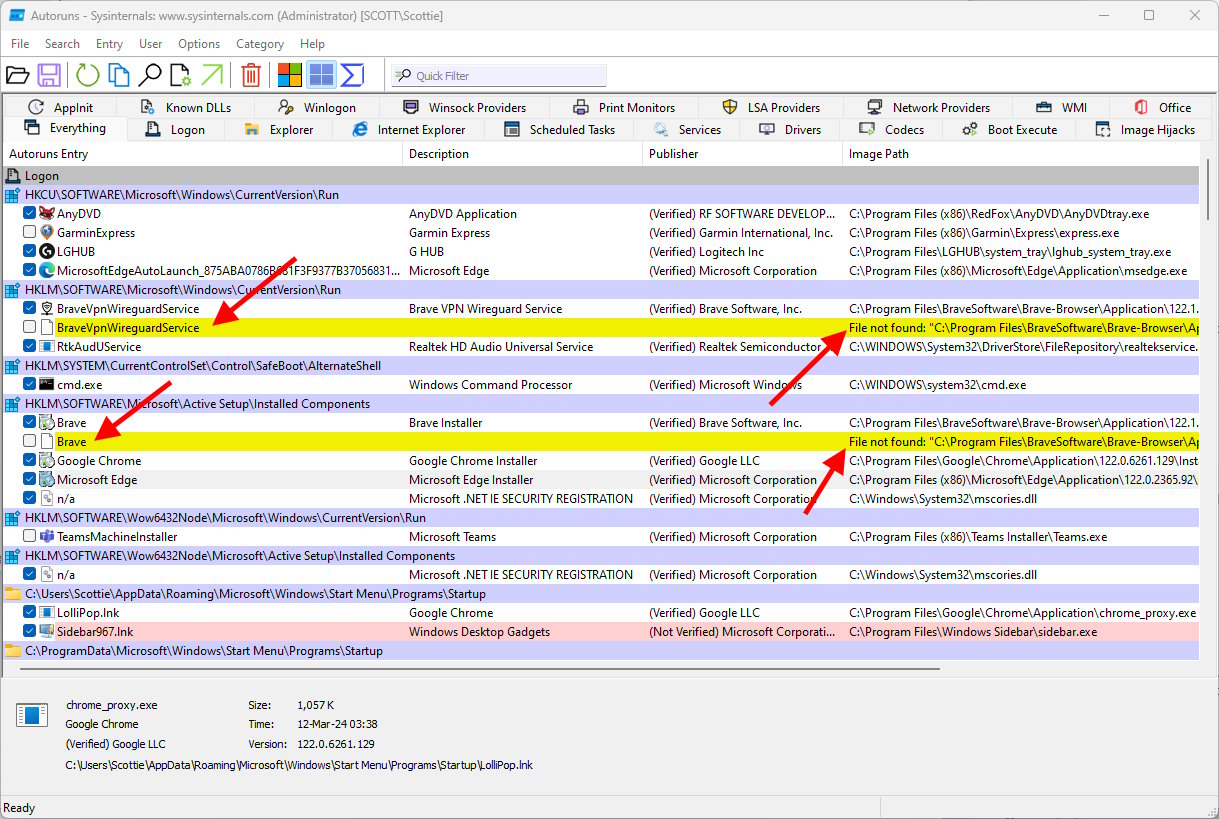
In the right-hand column, you’ll see that it says File not found. For all such yellow entries, it’s probably safe to right-click each one, and choose Delete. Voila! Your startup list is already getting cleaner.
But what about the red entries?
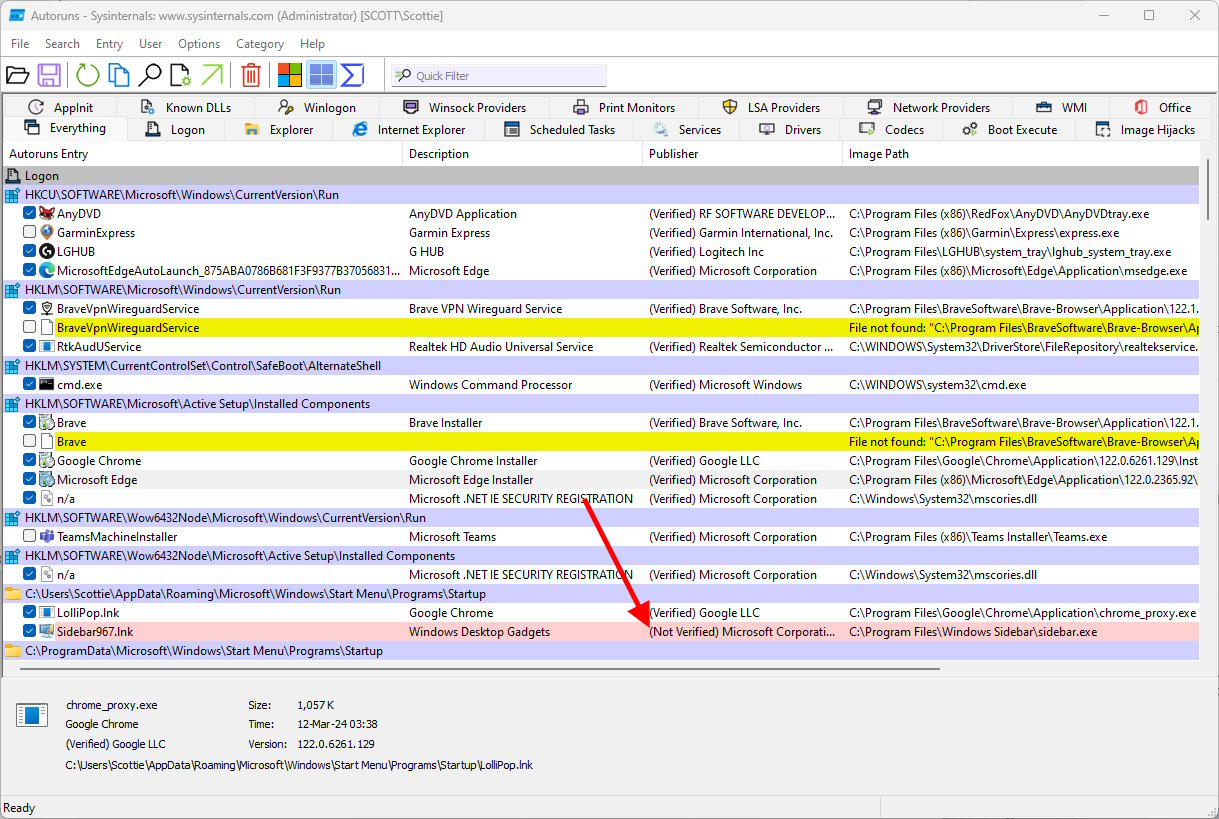
In the Publisher column, you’ll see that red entries (if present) are marked as Not Verified by Microsoft. This does NOT mean that they’re malware or dangerous. In my case, I use 8GadgetPack to bring back the old Windows Sidebar, so that one’s okay.
Next: Just look over the rest of the listed startup apps, and UNcheck ones you want to prevent from running. If anything breaks when you reboot, just go back into Autoruns and re-enable them.
Most of the time, nothing will break, so don’t worry too much.
If there is an entry for a program you’ve already uninstalled, you can either disable it using the checkbox, OR right-click and Delete it. That was easy!
Other Goodies
There are some other goodies “hidden” in Autoruns, such as:
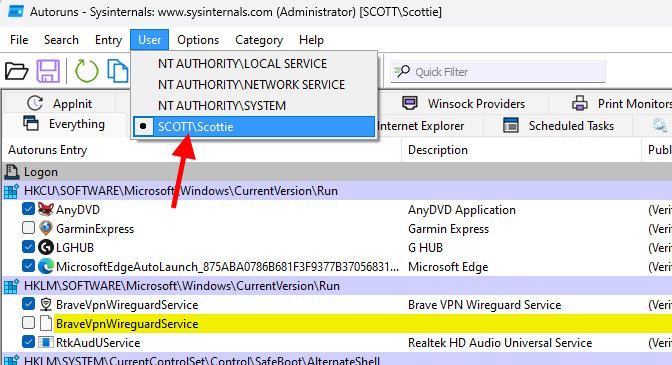
Changing the user. By default, you’ll see startup applications for your user account. But you can also change the settings via the User menu as shown above to see Local, Network, and System services. Sometimes, startup apps like to hide…
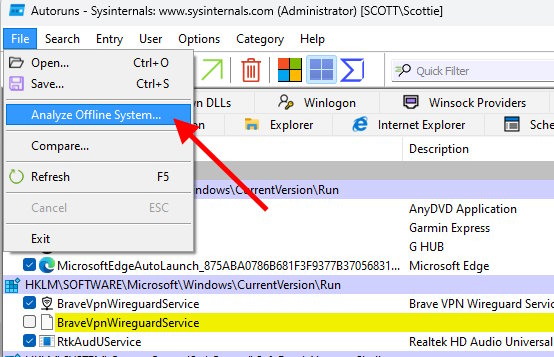
In the File menu, you can choose Analyze Offline System.
This allows you to check/disable startup apps on another copy of Windows. Not terribly useful unless you’re a hardcore techie, but I can think of a few situations where it would have been handy to have!
There you have it
So, that’s it! Autoruns finds more startup apps than any other tool I’ve tried. I’m not sure why they simply don’t include it with Windows, but whatever.
Get disablin’ and watch your puter fly through your boot screen and load your desktop in a flash!
And if your puter is still pokey, consider upgrading to an SSD like the Samsung 870 QVO 1TB (affiliate link). If you’ve got an old mechanical platter hard drive, the difference in overall puter speed will blow your mind!


Recent Comments