 Before Windows 11 was even released, Microsoft announced that not all puters would be able to run it.
Normally, Win 11 requires TPM 2.0, secure boot, more RAM, and so on.
So, a lot of people with older machines haven’t been able to upgrade to the latest version of Windows.
Fortunately, there’s a neat little trick that anybody can use to make Windows 11 install on ANY computer out there – even machines that date back to the XP and Vista era!
First thing’s first
Let’s get real here for a minute: Windows 11 IS much larger and heavier than ancient Windows versions… So, the machine you install it on really should have:
- 4GB of RAM
- An SSD
- At least 2 processor cores
Will it work on even older machines? Sure! But it’ll still be pokey.
Having said that, it just so happens that Win 11 is usually faster than Windows 10 on the same hardware.
And if you’re still running Windows 7, for the love of all that’s holy, upgrade to Windows 11 now.
What you’ll need
It’s pretty easy. You’ll need:
- An 8GB or larger USB stick. I like SanDisk’s 16GB UltraFit USB 3.1 stick (affiliate link), which is currently about $7!!
- Rufus software (download Rufus here)
- Windows 11 ISO file
So, get your USB stick. Download the latest Rufus – it doesn’t even require installation! And finally, go to Microsoft’s web site and download the Media Creation Tool.
Preparing the Windows 11 ISO File
First, go to the Windows 11 Download page.
Scroll down to Create Windows 11 Installation Media, and click the Download Now button.
Run the Media Creation Tool.
Next steps:
- Accept the license agreement terms
- Select the Language and Edition of Windows if needed, then click Next
- On the “which media” screen, choose ISO file, and click Next
- Pick a location on your puter for the Windows.iso file, and download!
- When the download is done, just click Finish to close the MCT window
Rock and Roll!
Okay, now you’re ready. Don’t worry, it’s SUPER-easy.
Run Rufus by double-clicking the Rufus EXE file you downloaded earlier.
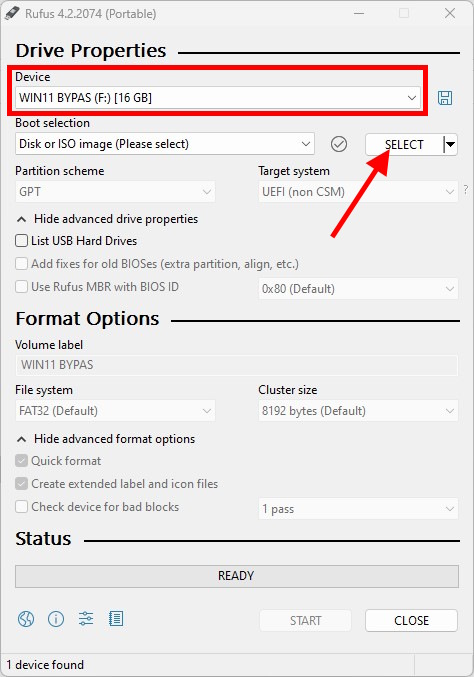
First, choose your USB stick under Device. Then, click the SELECT button and choose the Windows.iso file you downloaded from Microsoft earlier:
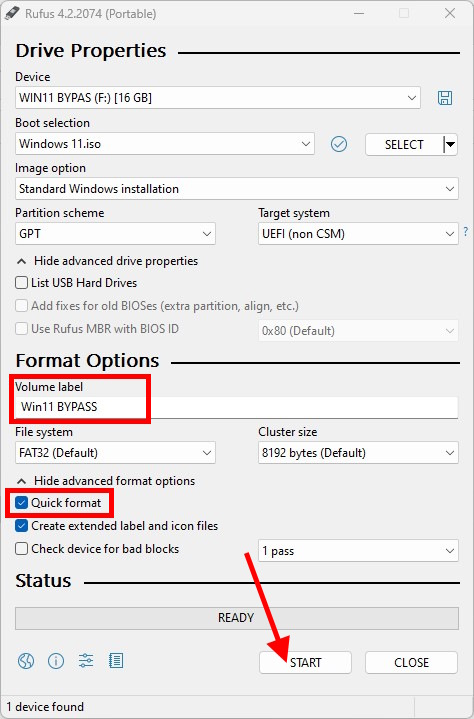
Alrighty. Next, make sure the defaults look like the following… If desired, you can change the Volume label. Also, make sure the Quick format option is CHECKED. This will speed up the process!
After clicking START, you’ll see a screen of Windows User Experience options:
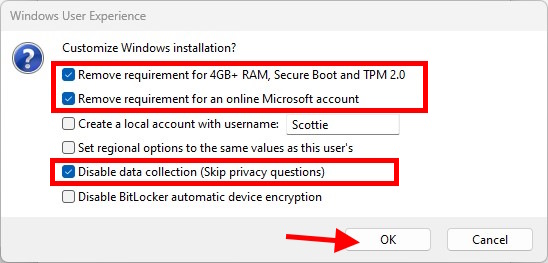
You’ll want to check the boxes for:
- Remove requirement for 4GB RAM, Secure Boot, and TPM 2.0
- Remove requirement for an online MS account
- Disable data collection
The first options is what allows Win 11 to be installed and run on old puters. The second option removes the need to log in with a Microsoft account during the Windows 11 install.
Unfortunately, MS added the MS account requirement at some point, and it’s really annoying. I always had to install by logging in to my MS account. Then, after the installation was complete, I hunted down and enabled a Local Account, disabled my MS account, and then had to log in to Windows again. It was really annoying – but not anymore!
Finally, the Disable data collection just means it won’t ask you to disable 50 million features that are only there so MS can invade your privacy (Can I access your location? How about contacts? E-mails?? And so on…)
Once you click OK, you’ll need to confirm the warning:
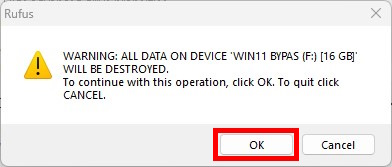
PHEW! Finally…
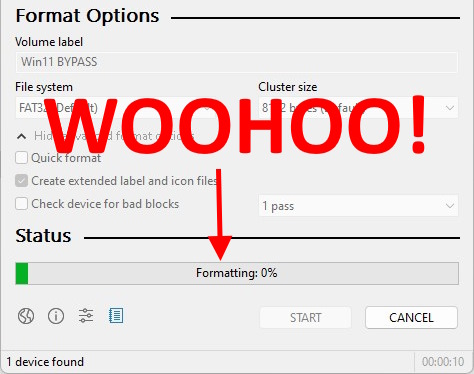
Now, just sit back and wait until it finishes formatting your USB stick and preparing the Windows 11 installation files.
Once it’s done, you can close Rufus.
Now just use your shiny new Windows 11 installation media to do an upgrade install OR boot from it and do a clean install of Windows 11 – on any puter you want!
By the way, you may have heard you won’t get updates this way. Not true! You should get updates just fine.
Enjoy!!!


Recent Comments