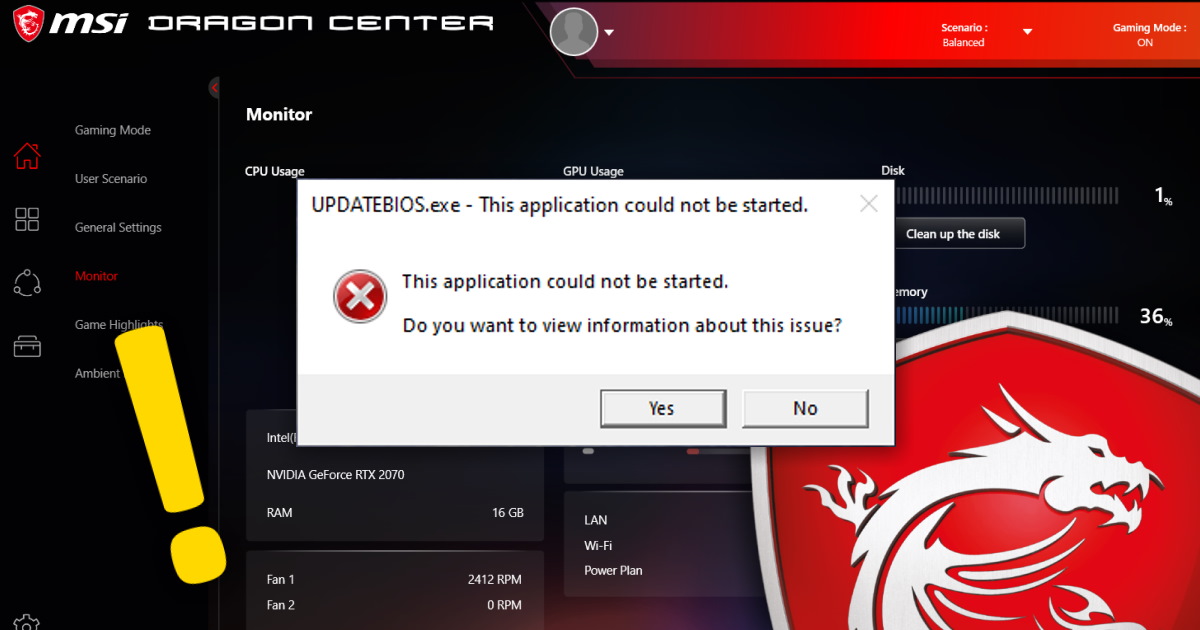
 If you have an MSI puter that you upgraded to Windows 11, you probably noticed an annoying little error. Every time you boot up, you got a popup window that states:
UPDATEBIOS.exe could not be started. Do you want to view information about this issue?
So of course you click Yes, and then you get another error message.
Obviously, the problem has something to do with the built-in Dragon Center software trying to do a BIOS update check – and failing.
Not to worry – the fix is pretty simple!
The error message
This is the error popup you should be seeing:
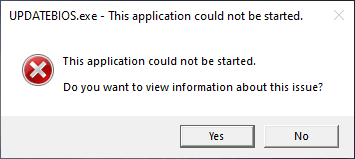
Naturally, there is no information about this issue. So, you may as well just click No to make the popup go away.
Next, let’s make it go away for good!
Method #1: Turn off auto-updates in Dragon Center
If you don’t care about automatic driver/BIOS updates, just turn off the Auto Update feature in Dragon Center (which you can start either by double-clicking the red icon in the system tray, or by just clicking the Start button and searching for “dragon”).
Ta-da! Problem solved.
Only trouble is that you no longer get automatic driver updates from MSI…
So, I opted for the better solution below.
Method #2: Compatibility Mode
This method actually works without disabling auto-updates from MSI.
Open Explorer (type Windows Key + E on your keyboard).
Navigate to the folder: Documents -> temp -> OneDC_Updater
You should see a file called OneDC_Updater.exe.

RIGHT-click that file, and choose Properties.
Now, you could click the Run compatibility troubleshooter button, but that’s a lot of extra clicking.
Instead, check the box for Run this program in compatibility mode for: and choose Windows 8 in the pulldown menu:

Then just click OK.
One last thing: If there is another file called updater.exe in the same folder or one level up in Documents\temp, delete it!
Now restart the puter, and the error message should be gone.
What the heck?! It’s not gone!
No worries… Go into Dragon Center and check your BIOS version. Then, go to MSI’s support page for your model. Just fine your product page, and click the Support link. Then click Firmware.
For example, this is the link to the GE75 Raider 10SF.
If there’s a new version of the BIOS available, download it. Follow the instructions and copy the BIOS update to a USB stick. Plug it in, reboot, and tap the Del key repeatedly to enter the BIOS setup. Find the BIOS update section, and let ‘er rip.
Then when the BIOS update is complete, boot back into Windows. You may need to repeat the above procedure for OneDC_Updater.exe.
Reboot one last time, and you should be all set!

thank you!
He seguido todos los pasos indicados (incluso actualizar la BIOS) y sigue saliendo el aviso. ¿sabemos otra solución?