 If you’ve ever designed a web site, you know that the ‘dev tools’ built into browsers are invaluable.
You can play with the CSS, debug JavaScript, see requests in realtime, and so on.
That’s all great for desktop, but what about debugging on mobile?
Typically, developers jump through all sorts of hoops – including hacks in their code that are added strictly for development debugging.
Isn’t there a better way? Why yes, there is…
Behold Remote Debugging
Many browsers have a Remote Debugging feature that can be used with mobile OSes like Android.
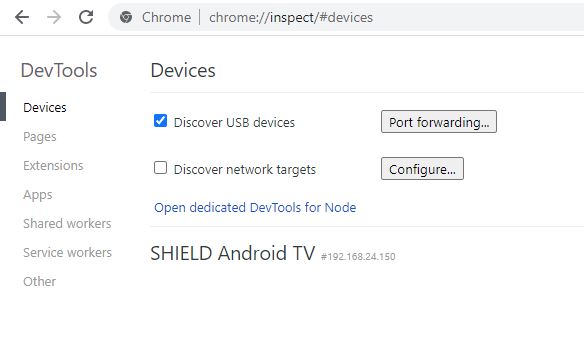
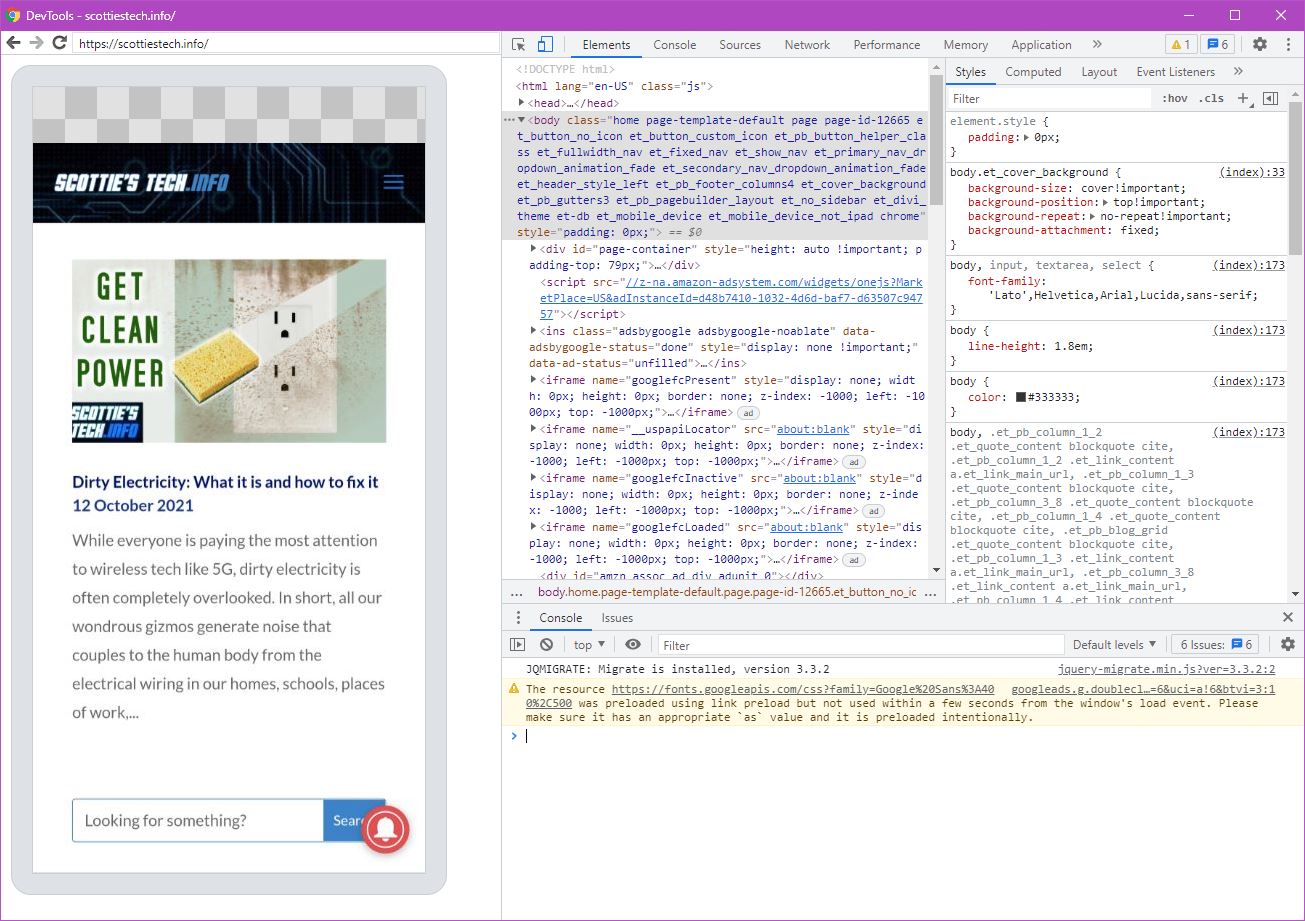
For example, in Chrome, you just go to: chrome://inspect/#devices
You’ll see something like this:
 In Firefox, you go here: about:debugging
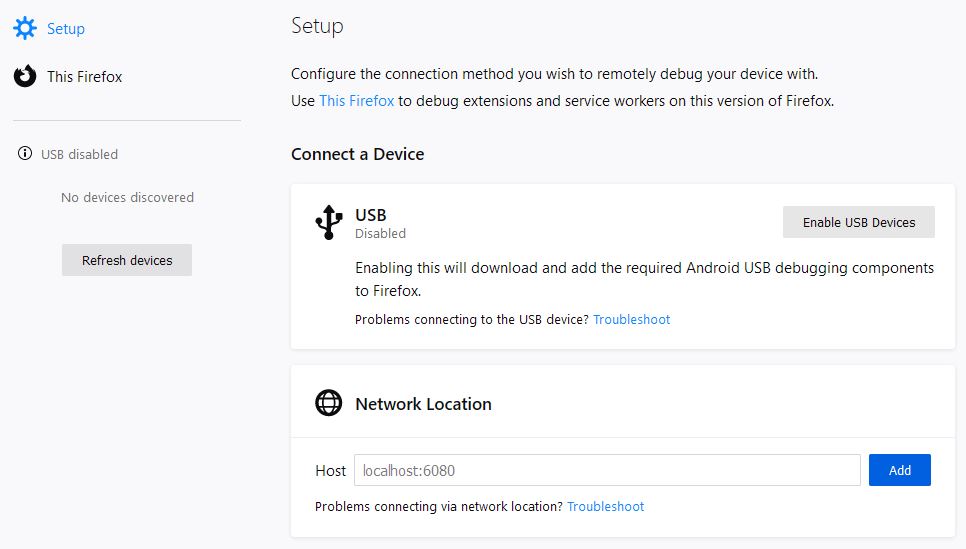
You can debug a localhost server on some port, or enable USB debugging.
USB debugging is quite handy since it lets you view the site on a virtual smartphone AND use all the dev tools – from your desktop browser.
In other words, there are no dev tools on smartphones, but you can link your phone to your puter with a USB cable and debug your mobile device using DevTools on desktop just like you would for the desktop version of the site. Pretty handy!
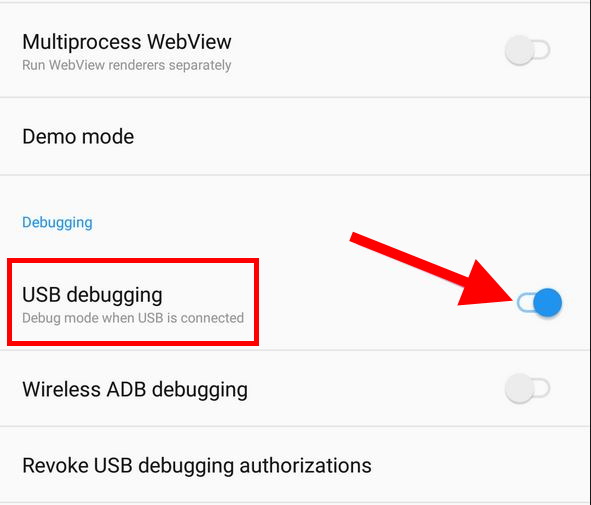
Enable USB Debugging on Android
First, you need to enable USB debugging. In Android, you’ll do:
- Settings > About Phone
- Tap the Build Number many times until Developer Options are enabled
- Settings > Developer Options
- Enable USB debugging
Depending on your make/model, the above settings might be moved somewhere else. Fortunately, you can just go into Settings and search for the options you’re looking for if you can’t find them.
Connect DevTools to your smartphone
Back in the Remote Debugging tab of your browser, you should see your smartphone appear as a device.
You’ll most likely be prompted on your phone to allow your puter to access the phone itself via USB debugging. Just approve it, et voila!
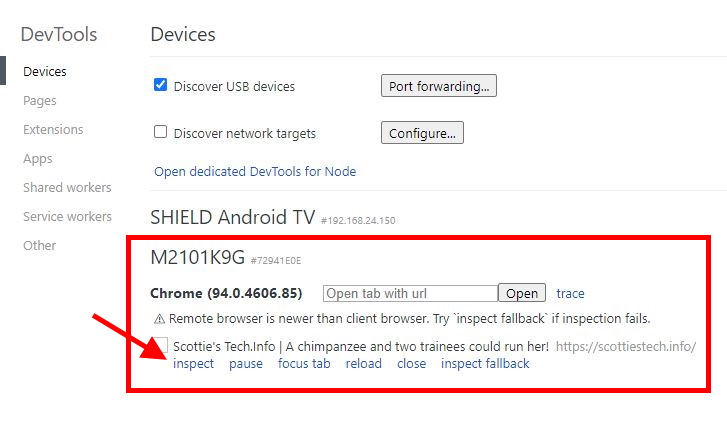
You can now click inspect on the USB device, and you’ll see something like this:
TA-DA!!
You can even click on the smartphone image and interact with it as if by touch using your mouse… Which is nice, but obviously it’s more useful to just tap your phone and carry on.
The process for other browsers like Firefox is pretty much the same.
Okay, so that’s all fine and dandy for debugging sites on The Internets… But what about:
How do I debug a local HTTPS site running on my development server?
This one’s a bit more difficult…
Sometimes, if you’re viewing a local dev site via localhost:443 or even just the IP address, you’ll be using a self-signed SSL certificate.![]()
That can be a big problem…
For example, certain JavaScript APIs simply won’t work if you’re using just HTTP or if you’re using a self-signed SSL certificate and you ‘added an exception’ in your browser.
Thus, the only way to test those features is to create your own SSL cert, along with a root certificate. You can then add the root certificate in Android by doing:
- Copy the root certificate to the phone via USB
- Open Settings
- Search for: credential
- Under Credential storage, tap Install a certificate
- Select the cert you copied to the phone
- Tap OK, and then enter a name for the certificate.
- Tap OK
Note: If you haven’t already, you’ll be asked to set a PIN, pattern, or password for your phone.
Also, you probably won’t want to leave this certificate installed on your phone indefinitely. In fact, many phones will give you a regular warning that the cert is invalid since this is a security risk.
But the good news is that your HTTPS site will work perfectly since the browser will be able to verify the SSL cert using the root cert you added!
Can I modify the ‘hosts’ file on Android?
In a word, no. Not unless your phone is rooted, anyway.
In this case, you want to be able to point a domain (like scottiestech.info) to a local IP address, like 192.168.0.105.
Sometimes this is useful if you’re doing things like subdomains for different languages, and you’ve got code running in your backend that gets all screwed up if you access your dev site(s) by IP addy.
In this case, the best option is to use your router as a DNS server.
For example, in OpenWrt, I can do: Network > DHCP and DNS > Resolv and Hosts Files.
Under Additional Hosts files, I add: /etc/hosts-more
Then I create the file /etc/hosts-more with:
192.168.0.105 scottiestech.info
This will make it so that any puters on the LAN using the router as DNS server will be served up with my local dev site IP address for the domain scottiestech.info.
All that’s left is to go onto my phone, long-press the WiFi connection to my LAN, change from Dynamic to Static IP, and set DNS server 1 to the IP of my router: 192.168.0.1. TA-DA!
Just don’t forget to remove the custom DNS server from your phone when you’re done. Also, if you use your router as DNS server already, you should only need to remove the extra entry from /etc/hosts-more (or equivalent for your particular router).
That was fun
It takes a bit of time to get all this working the first time around…
But once you’re used to it, you’ll find it to be a very easy and speedy way of debugging mobile sites – including local dev sites running on your own server or virtual machine!


Recent Comments