 Video is all the rage these days. Heck, even I started a YouTube channel!
Even if you’re not a “video author”, you still probably record videos of family, friends, important events, and so on.
The video files saved by most devices – including smartphones – is usually not optimal in terms of compression and especially in terms of file size.
Normally, editing and even just compressing/re-encoding videos is really complicated. Fortunately, there is a free piece of software that lets you shrink and optimize all your vids in just a few quick clicks.
Video files are BIG
Let’s say you take a video, and do some editing. Then, you tell your easy-as-pie video editing software to spit out a video file to share with friends.
You’ll probably end up with something like a 6 minute video, but it takes up 2.5GB of space! Why so big??
Well, if you check the video file’s properties, you’ll most likely see something like this:
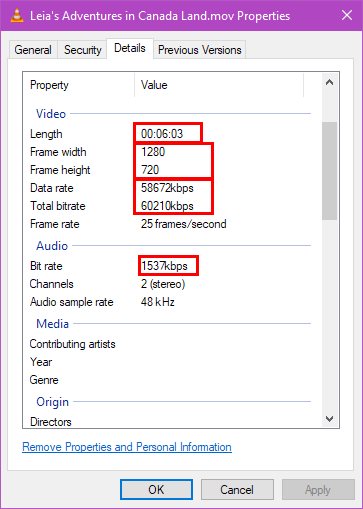
Note that even though the length of this MOV video is only 6 minutes and 3 seconds, and even though it’s only 720p (1280 x 720 pixels), it’s still 2.5GB in size due to the video’s Data rate and the audio channel’s Bit rate. Both those values are waaaay too high – unnecessarily high!
This is exactly what most gizmos and mainstream video editing software spits out in order to preserve quality. That’s great, but a 6 minute video should never be 2.5GB unless you’re working on the next Hollywood blockbuster…
Put on the HandBrake!
The solution is to re-encode, or transcode, the video by using software that will also compress everything down to a reasonable video data rate and audio bit rate.
Of course, it’s hard to know what data rates and bit rates are actually good enough to maintain quality, but not so high that file size increases to Jupiterian proportions.
Enter HandBrake!
HandBrake is free software available for Windows, Mac, and Linux.
Grab a copy here: Download HandBrake
Now, when you fire it up, you’ll see one gajillion options, and you’ll probably freak out like I did. I mean, what does all that even mean?
Well, fear not! You don’t need to understand all the fancy options to optimize your video files – you just need to click a few things, and you’re off and running.
HandBrake settings for shrinking/optimizing video files
Step 1 is to have your video file handy. I usually plop mine temporarily on my desktop. Then, fire up HandBrake:
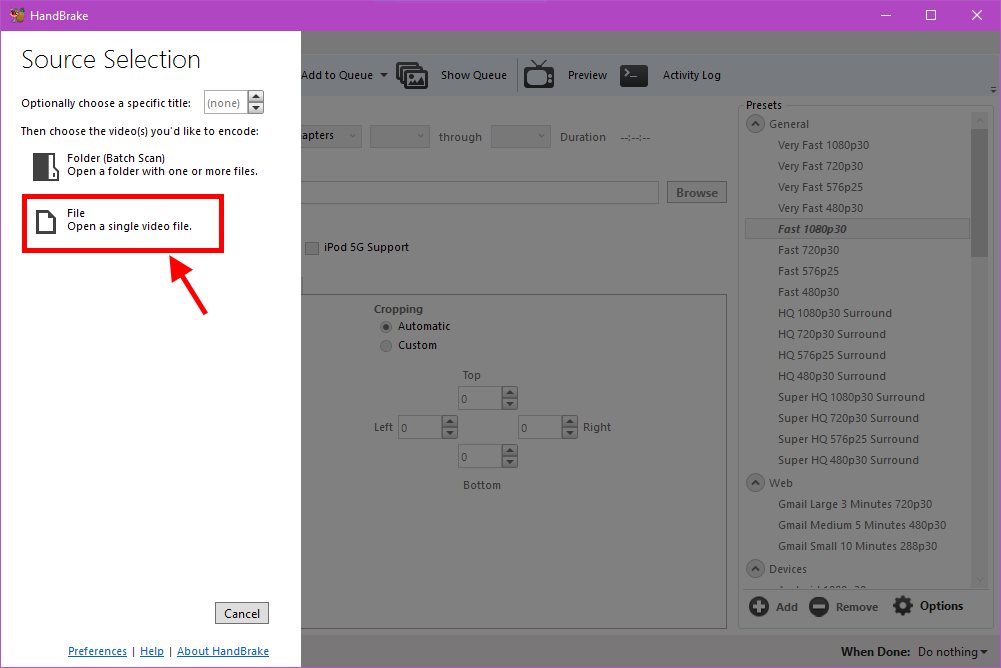
Click File, and then select the video file you want to shrinkify. HandBrake will open the file, and present you with lots of crazy options:
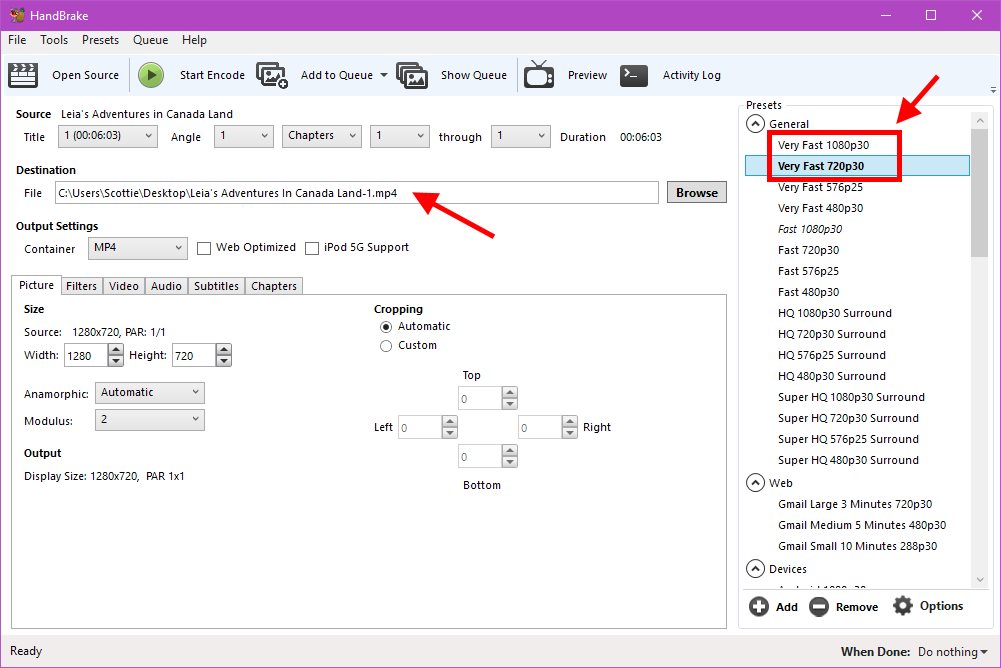
On this screen, you can see the Destination filename. Normally, HandBrake will use the name of your original video file, and just add “-1” on the end. It will also convert the video format to MP4. This is actually ideal, because darn near everything supports MP4 – including YouTube!
In the Preset column on the right, you’ll most likely want to pick one of two values:
- Very Fast 1080p30
- Very Fast 720p30
If you want your video to be FullHD (Blu-ray resolution), pick Very Fast 1080p30. For standard HD, choose Very Fast 720p30. Naturally, FullHD video files will be much larger than HD video files.
The Very Fast presets basically mean that HandBrake will super-optimize your video file. Normally, you won’t really notice the difference in video quality. The Very Fast presets also take less time to transcode your video, which is nice.
This Preset also takes care of setting the video data rate to a good value.
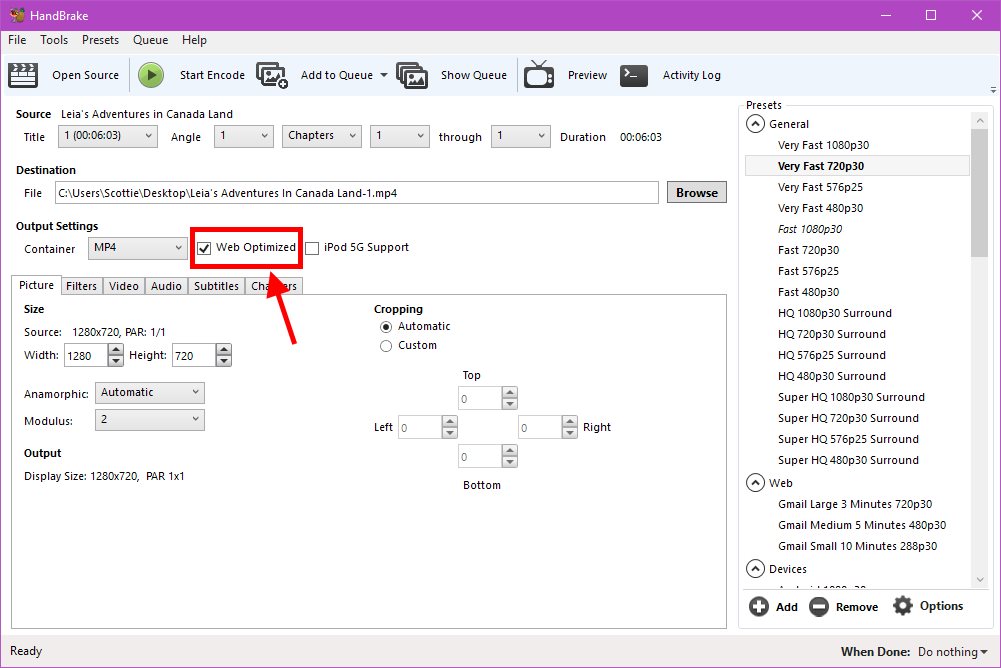
Next, make sure the Web Optimized checkbox is CHECKED.
In short, this option makes your shrunken video file a little bit bigger, but it also optimizes it for online streaming. It makes your new video file a bit more “multi-purpose” so you can do anything you want with it, and everything should “just work”.
Almost done!
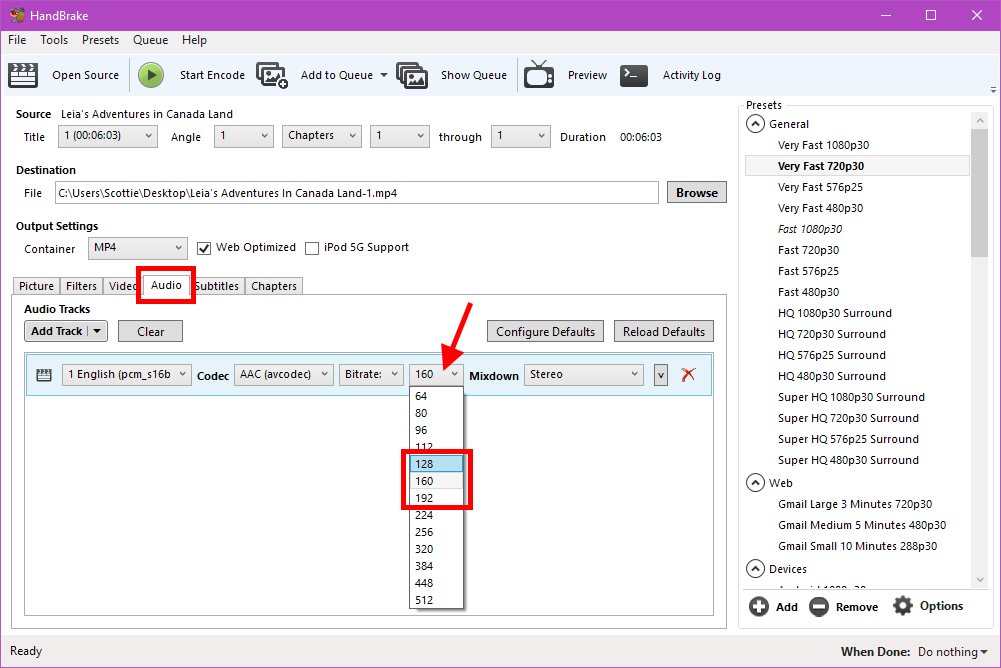
Next, click the Audio tab. In the pulldown menu under the red arrow in the above screenshot, you’ll want to choose an audio bit rate for your video. I usually always pick 128 (kbps). 128 is CD quality, which is good enough for most people.
If you’re an audiophile, you can choose 160 or 192.
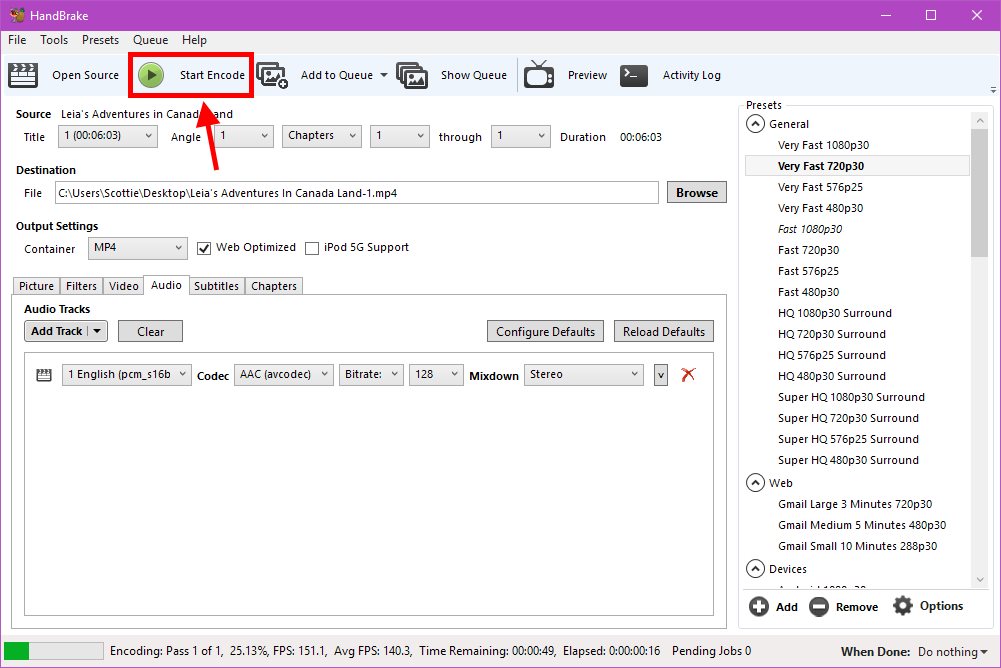
All set. Click the Start Encode button!
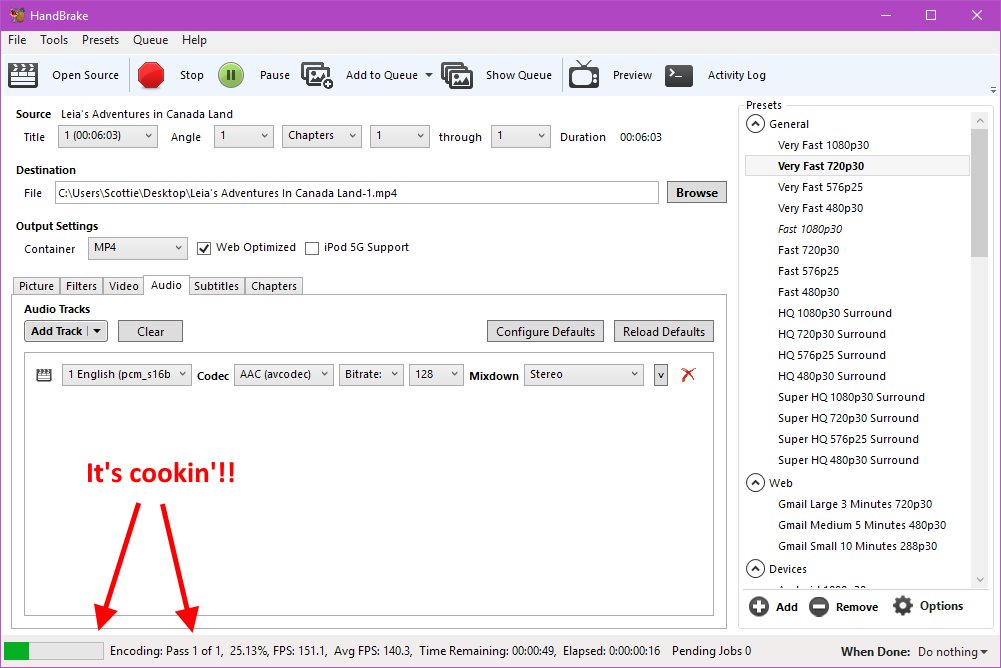
At this point, the Start encoding button will change to Stop. At the bottom of the screen, you can see the progress of the encoding process.
Your puter’s cooling fans may spin up a bit, because it’s working hard to process your video. After a few minutes (depending on your puter’s speed and the video file size), it will be done.
Next to your original video file (say, on your desktop), there should be a copy now with “-1” at the end.
Check out the file size of the now-compressed and optimized video file!
In the example file I used, the difference is huge:
Before:
- MOV video file
- 2.5GB file size
- 1280 x 720 resolution
- 58,672 kbps Data rate
- 1,537 kbps Audio bit rate
After:
- MP4 video file
- 151MB file size (16 times smaller!)
- 1280 x 720 resolution
- 3,332 kbps Data rate
- 128 kbps Audio bit rate
Not too shabby, eh? When I watch both videos to compare them, I can’t tell that there’s any difference in either video or audio quality.
So, grab HandBrake for free today and shrink all your videos! Your hard drive and your friends will thank you.


Trackbacks/Pingbacks