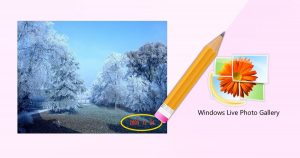
 Seven years ago, I wrote a post entitled How to Easily Print a Large Image to Multiple Pages in Windows. This post has been one of the most popular articles on this site for quite some time now.
Like me, you were probably surprised that Windows could do this – hardly anyone knew about it!
Fast forward to today, and a reader recently asked me if I knew of a way to remove a date stamp from a photo. I said no, but then I discovered a feature sitting right in front of my nose this whole time.
It turns out that you can easily remove a date stamp from a photo on your puter – no Photoshop required!
In the case of printing a large image to multiple pages, MS Paint is all you need. Paint comes built in to Windows.
For removing date stamps, I’m afraid you might need to download some software. But fear not!
The software you need is Microsoft’s own Windows Photo Gallery. Now, in many cases, this software is already installed on your Windows 7 puter. For fresh Windows 8 and 10 puters, you’ll need to download and install Windows Photo Gallery (for free) from Microsoft’s site.
Note: This used to be called “Live Photo Gallery”, which is the Vista/2011 version. Click the links above to get the “Windows Essentials Photo Gallery”, which is the updated 2012 version!
This may seem kind of annoying, because who wants to learn yet more new software? But in this case, I highly recommend it. It’s much fancier than the default Windows 7 photo viewer, but still very easy to use to help organize, tag, and touch up your photo collection.
To see if you have it already installed, click the Start button (Windows logo) and type: Live
If it doesn’t show up, head over to Microsoft’s site and download the Windows Photo Gallery installer. If that link doesn’t work anymore, see here!
Once Photo Gallery is installed, fire it up.
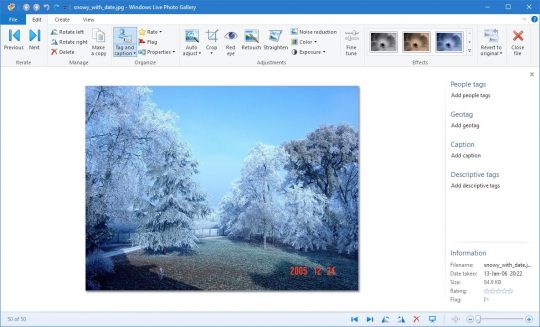
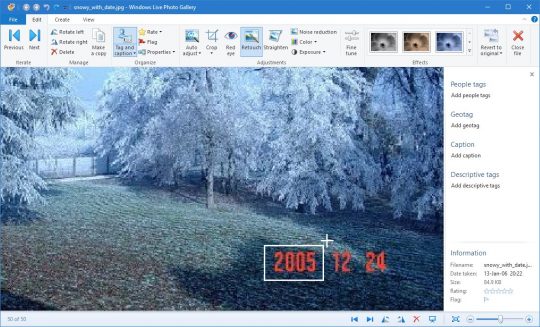
Next, you just need to find and open your photo in Photo Gallery. You’ll see something like this:
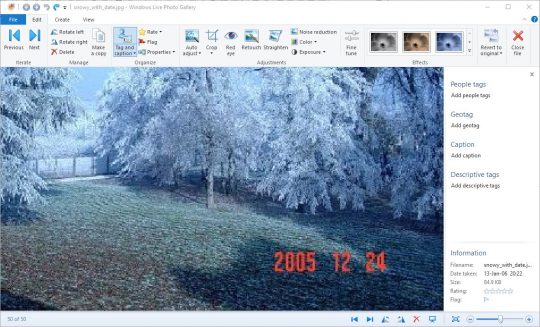
You can use your mouse wheel or the slider in the lower right-hand corner of the window to zoom in on your pesky date stamp:
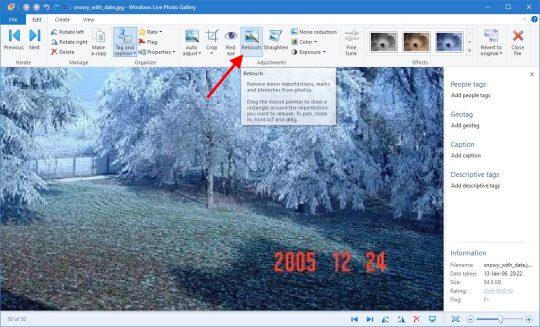
Now you just need to click on the Retouch button:
To erase the date stamp, you just click and drag to draw a box over the reddish date. When you let go of the mouse button, the Retouch feature will automagically “erase” the date and fill it with colors similar to the surrounding section of the photo.
Note that the box can only be a limited size, but that’s okay. It’s better to draw a box around each part of the date: year first, then month, then day. Also, sometimes Retouch will screw up the area inside the box instead of making it pretty. When that happens, you have two options:
- Ctrl-Z: hold down the Ctrl key, and type the letter z. Voila! Your last Retouch step is undone. Try again, but this time select a slightly different space around the date field (bigger box, smaller box, more space above the date, more space below, etc.)
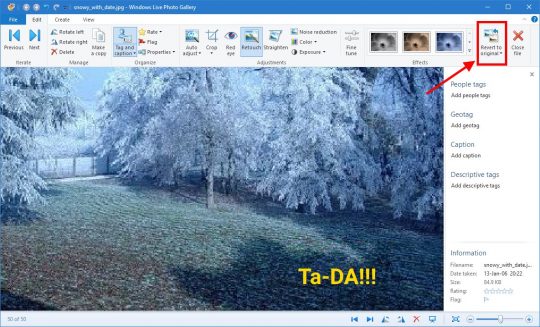
- Use the Revert to Original button:
Windows Live Photo Gallery always saves your original image, without any retouching or other edits you make. At any time, you can go in and revert to the original copy of the photo. So, it’s hard to screw up your photos. Three weeks later, you can fire up Live Photo Gallery and revert an image you edited to its pristine original state. Pretty handy!
Also, play around with Live Photo Gallery to see what else it can do. It’s got red-eye reduction, automagical image optimization, filters, and all kinds of other fun goodies to touch up your photos and give them a bit of extra “pop”.
A note on the Windows 10 Photos app
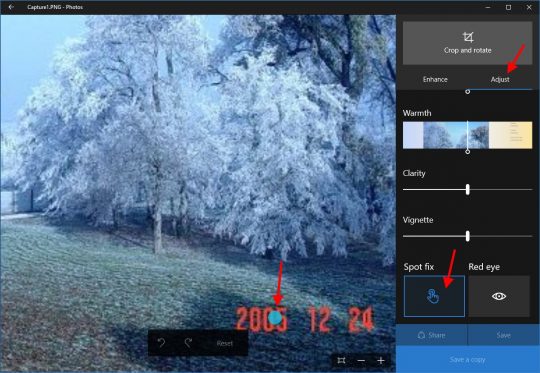
Windows 10 comes with the Photos app by default. Photos has a “Spot fix” feature that is essentially the same as Retouch in the older Windows Live Photo Gallery:
Trouble is, Spot fix doesn’t work very well. So, if you have Windows 10, I still recommend downloading Windows Live Photo Gallery because everything just works better.
Anyway, that’s all there is to it!


Thank you! Your instructions were easy to follow and worked great – including the link for help with downloading MS Photo Gallery.
Thanks again.
Thank you so much! As noted by another that followed your steps, such easy instructions… and with a little time and patience, the photos still look great. I tried the Spot Fix and you’re right, it doesn’t work well and was VERY annoying to try and use. Thank you!
Thank you so much! Saved me from having to retake a hundred pics!
I wish every how-to was this clearly written and right to the point, and it has the added benefit of working just as described.
Nicely done, and thank you very much!
This one is great! I really love how it works on removing unwanted content from photo. Just like the tool that I’m currently using which is Apowersoft Watermark Remover.
Thank you! Your suggestion helped a lot!
Thank you for your help and very clear intructions and links. I managed to find a reputable site to download Windows Photo Gallery and have managed to remove all the dates from the photos. It does need a little time and patience but it work.
Again many thanks
Thank you. Your advice worked so far, but I can’t find how to save my changes. Please help!
You don’t have to save them. Once the red eye is fixed, you can just click the Previous or Next buttons (top left) to move to a different photo, or the Close button (top right) and the changes should be saved automatically.