 First, FYI: Exactly one week from today, 29 July 2016, Windows 10 will no longer be a free upgrade. So, if you’ve been thinking about upgrading to 10, now’s the time!
Next, I recently ran into a problem trying to upgrade a puter from Windows 7 to Windows 10.
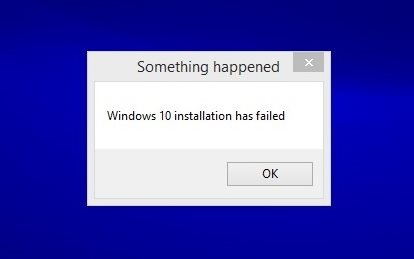
I’d run the Win 10 installer from within Win 7. It would reach the point where it was about to reboot for the first time to actually start the upgrade, and I’d get the following lovely error message:
Something happened – Windows 10 installation failed.
Gosh, that’s helpful.
There are many “fixes” for this Something Happened Error, but none of them worked for me. After a bit of digging, I found a solution that works!
If you’re seeing the Something Happened error, you could just try all the other bazillion solutions you find on the net…
But that ends up taking a lot of time (trust me), and there’s a much simpler way to figure out exactly what’s causing the issue: the Windows 10 installer error log! What a concept, eh?
Once you see the Something Happened error, open Explorer and find this folder (you may have UNcheck the “Hide operating system files” option in Explorer settings first):
C:\$WINDOWS.~BT\Sources\Panther\
Inside that folder, there will be a file called setuperr.log. Open this file in a text editor like Notepad++, and see what happened near the very end. The Windows 10 installer kindly keeps a record for you of everything it does, so you’ll probably find something like this:
2016-07-18 15:24:33, Error IBSLIB OSRollbackService::CBootFilesRestoreCheckpoint::Finalize: Failed to backup BCD database from “F:\Boot\BCD” to “C:\$WINDOWS.~BT\Sources\Rollback\Boot\BCD”.[gle=0x00000006]
2016-07-18 15:24:33, Error [0x064199] IBSLIB SetCheckpoint(WinPEBootFilesRestoreCheckpoint): threw exception.: class RollbackException: RollbackException: Error(6), CSystemVolumeSelectionCheckpoint: Failed to backup BCD database. void __cdecl OSRollbackService::CBootFilesRestoreCheckpoint::Finalize(const unsigned short *,struct OSRollbackService::ICheckpointParameters *)[gle=0x00000006]
Congratulations, you just figured out the problem!
When the Win 10 installer tries to copy the BCD (Boot Configuration Data) from your hidden system partition, the copy fails. This step is what happens juuuust before the puter reboots to really start the Windows 10 installation.
All that’s left is to figure out how to fix this BCD file…
Okay. The BCD is stored on the System Partition, which is a hidden 100MB to 300MB partition on your hard drive that usually sits in front of your C:. But, you can’t see it normally in Explorer. Nevertheless, you need to repair it. For that, we’ll need to use the Win RE (Windows Recovery Environment).
You’ll need to do one of the following:
The easiest option is if you have the install DVD for your version of Windows. Then, just do this:
- Boot from the Windows 7/8 installation disc
- When you’re at the initial language options, just click Next
- Then click the Repair your Computer option
- Next, click Command Prompt
This will get you into a “clean” Win RE Command Prompt from which you can fix the BCD.
To ensure that your BCD is screwed up, in the Win RE command prompt window, type:
bcdedit /export C:\BCD_backup
If you get the message “The handle is invalid“, you know you’re on the right track.
Next, you need to follow the instructions here, which I will also summarize below:
- Type: C:
- Type: cd boot
- Type: attrib -s -h -r bcd
- Type: ren C:\boot\bcd bcd.old
- Type: bootrec /rebuildbcd
You’re done!
What you just did: change into the Boot directory on your System Partition, use the attrib command to make the BCD file editable by you, rename the BCD file so you have a backup, and then run the BCD rebuild command (which works much better now since the original BCD file no longer exists on the drive after you renamed it).
You can check to make sure that the BCD is working by repeating this command:
bcdedit /export C:\BCD_backup
If it works, your BCD has been rebuilt and all is well. You can now reboot your puter into Windows 7/8, and try rerunning the Windows 10 upgrade.
For good measure, you can also do:
- Type: X:
- Type: chkdsk /f /r C:
That will run the disk checking utility on your System Partition and fix any errors – just in case you’ve got a bad sector or something on your hard drive.
Anyway, reboot, and this time the Win 10 install should work!
Note that if you use the automated Startup Repair option instead of the Command Prompt, it won’t necessarily fix the problem. I tried that route, but Win 10 still wasn’t happy. I also had already tried to just do bootrec /fixmbr and bootrec /fixboot from the Win RE Command Prompt, and that didn’t help either…
It seems the key is to totally rebuild the BCD file, and then you’re good to go.
Hope this saves somebody else some grief!


Trackbacks/Pingbacks