 You’ve got Windows 7 or Windows 8, and you’ve decided not to upgrade to Windows 10.
Carry on, then!
If you have Windows 7, you will still get security updates until 2020. If you have Windows 8.1, you’re safe until 2023.
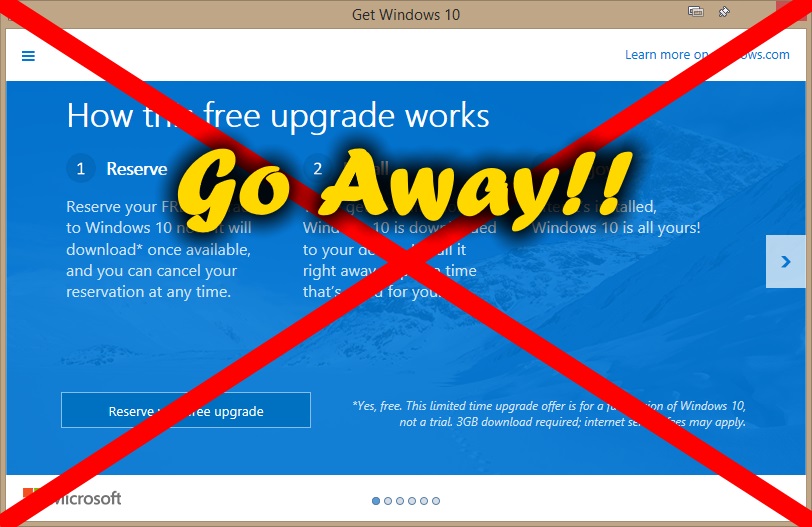
There’s only one problem: That damn GWX (Get Windows 10) notification keeps bugging you about upgrading to Windows 10!
How to make it go away? Read on!
A few notes
First of all, keep in mind that the following two tricks work – for now.
There is nothing that guarantees that Microsoft won’t change things and try to pester you again somehow. But, at least for now, the following steps will stop the GWX tray icon and popup window.
Second, note that Windows 10 is an improvement in many ways over 7 and 8. It also has its problems, like every version of Windows. The “fast release cycle” Microsoft has adopted also naturally means newer versions of Win 10 aren’t quite as refined and stable as the more-slowly-released “Service Packs” of Windows 7 and 8.
Finally, Microsoft recently announced that from now on, new processors from Intel and AMD will only be supported on Windows 10. Even the latest generation of Intel Skylake processors will only be supported on Windows 7 or 8 for another 2 years or so. In other words, if you upgrade to a new puter, you’re going to be stuck with Windows 10 whether you like it or not. And I suspect M$ is only going to make things worse as time roles on…
Anyway, it’s up to you.
There are two ways to turn off GWX, depending on what version of Windows you currently have. Choose the proper technique based on your version of Windows. To know what version you have, right-click on My Computer (aka Computer) and choose Properties. The window that pops up will show you what edition of Windows you have.
Stop GWX for Windows 7 Pro, Windows 7 Ultimate, and Windows 8 Pro
This one is a bit easier.
Click the Start button.
Type: gpedit.msc
Press the Enter key to run the Local Group Policy Editor.
In the left pane, navigate to:
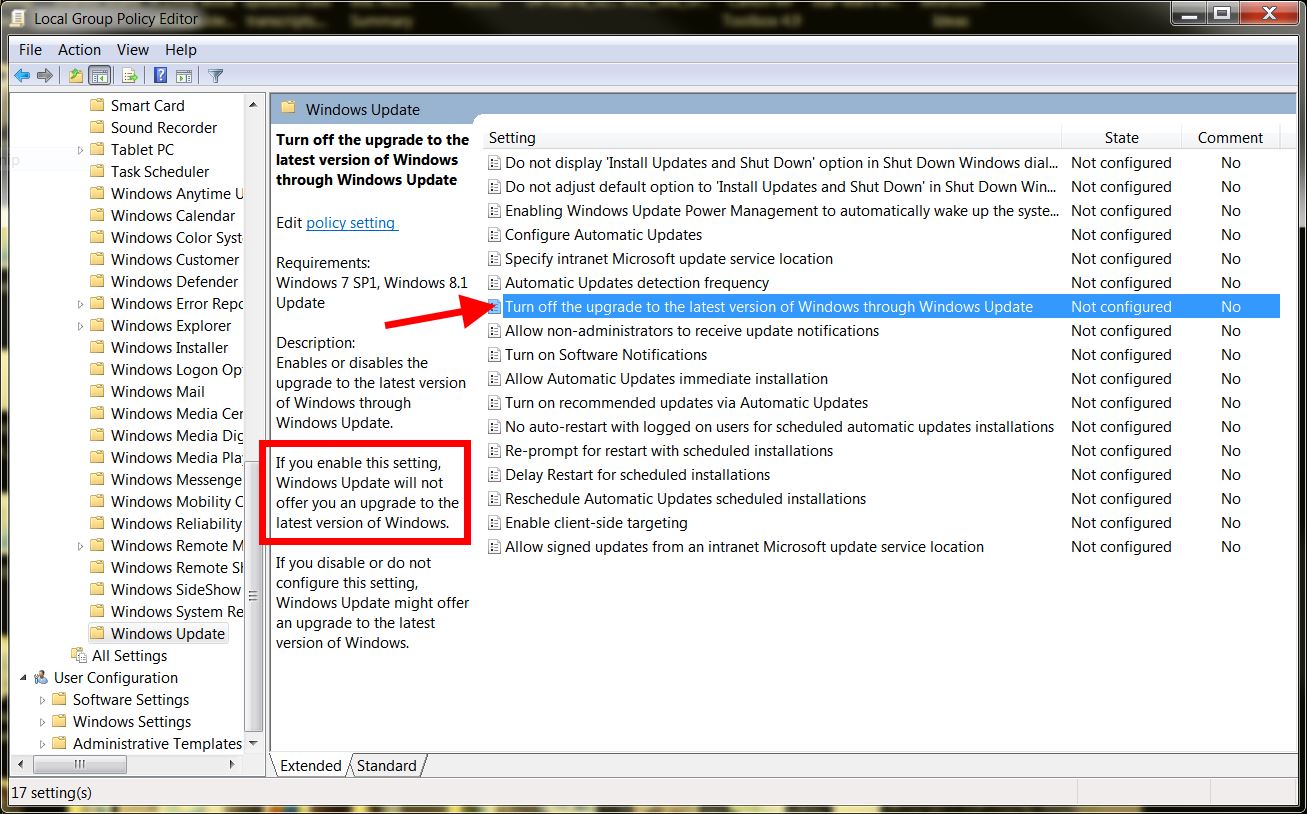
Computer Configuration > Administrative Templates > Windows Components > Windows Update
If that doesn’t exist, try:
Computer Configuration > Administrative Templates > Windows Components > Windows Update Policy
Double-click the setting Turn off the upgrade to the latest version of Windows through Windows Update
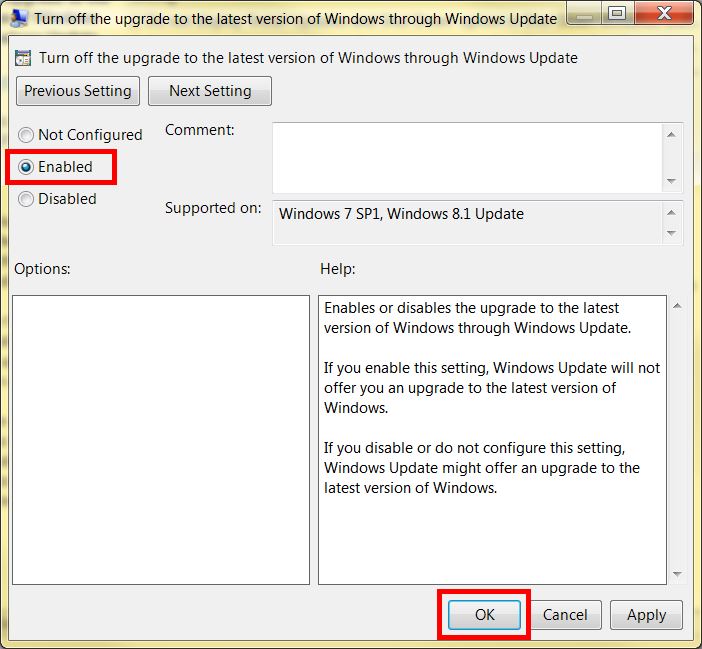
In the popup window, click the Enabled radio button, and then click OK.
Reboot to ensure the setting takes. You’re done!
Stop GWX for Windows 7 and Windows 8 Home, Student, etc.
Click the Start button.
Type: regedit
Press the Enter key to run the Registry Editor.
In the left pane, you need to navigate to:
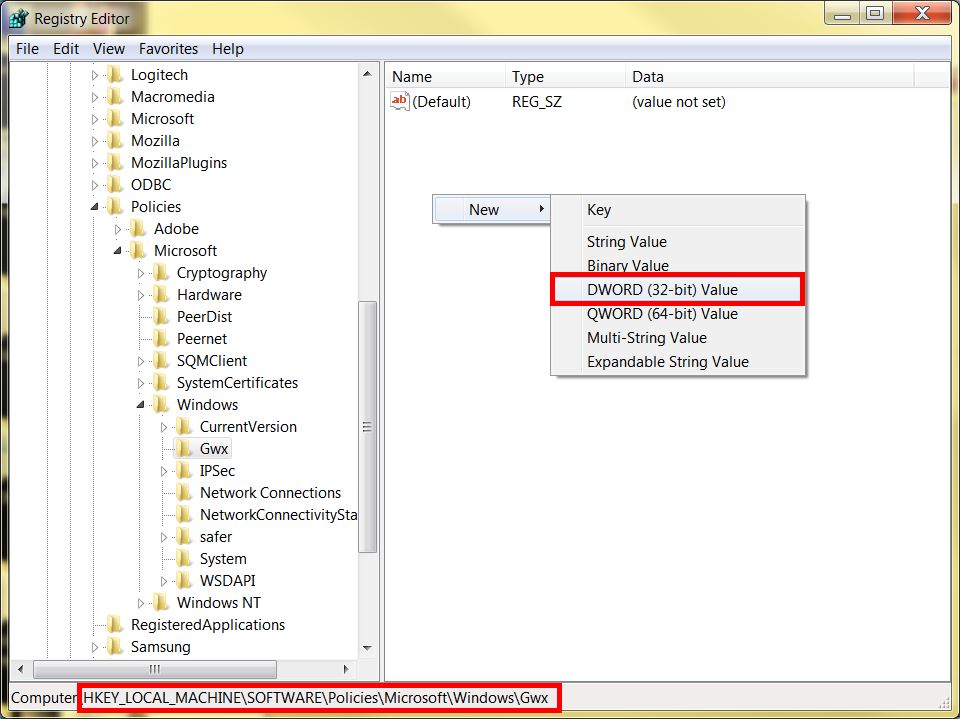
HKEY_LOCAL_MACHINE\Software\Policies\Microsoft\Windows\Gwx
Right-click in the empty space in the right-hand pane, and choose New -> DWORD (32-bit) value
For the newly created value, type the name: DisableGwx
You should now see this:
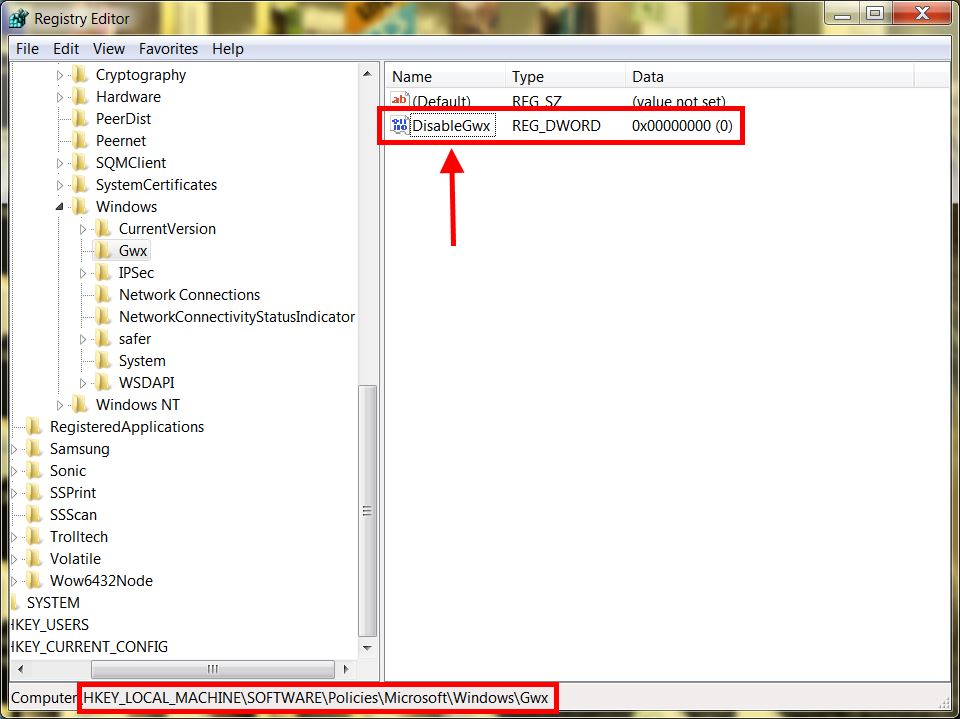
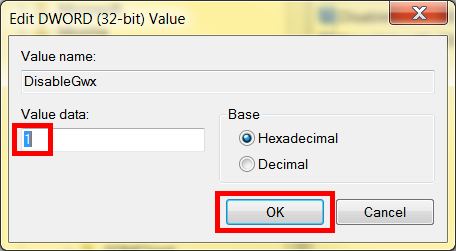
Double-click the new DisableGwx value, change the Value data: field to 1, and then click OK.
Close the Registry Editor, and reboot! You’re done.
That’s all there is to it. The GWX / Windows 10 upgrade notification icon should disappear from your system tray, and you should no longer receive the annoying “Get Windows 10” popup windows.
What if I change my mind?
The Windows 10 upgrade is free until July 2016. If you change your mind and decide to upgrade to Windows 10 after all, just reverse the above procedures.
For the Registry Editor method, you would just right-click the DisableGwx entry you created previously, and choose Delete – then reboot. POOF! It’s back, and you can still upgrade to Windows 10 easily.

For some reason I did not get the GX notifications to upgrade from 7. But Microsoft Security Essentials (free to download and install but not included in 7) kept hanging on one file or another. Although I do not like Microsoft’s philosophy of change for its own sake, (really planned obsolescence for profit) I felt like sticking myself in the past would be a losing proposition. I felt I should upgrade to 10 while it is still free to do so.
Yeah. Well, the free upgrade offer lasts until July. I suspect one reason MS is adding more and more restrictions to using older versions of Windows is to push as many people as possible to upgrade before then. So, I think it’s gonna get worse. While it is true that Windows 10 is more buggy sometimes due to the faster big updates, I have to say I still don’t want to switch back to 7.
Windows Media Center is a fantastic application that was mostly ignored by most people because they didn’t understand what it was.
Its a DVR so you can record TV shows off of the air or from Cable.
There are a bunch of people who would have upgraded to Windows 10 had Windows Media Center been bundled with Windows 10.
So far, there still isn’t a solution for Windows 10 that’s as good as Windows Media Center.
But, there are several groups (both open source and proprietary) that are doing some excellent work at creating a replacement.