 Let’s say you need to capture all or part of your puter’s screen. You’d like to grab a quick image of your browser window, or maybe you want to capture a frame from a video playing on your puter. Maybe you want to save an image from a web page, but they’ve disabled the right-click menu.
There are lots of ways to do this with fancy software. There are also much, much easier ways that you may not know about.
The first is the “PrintScrn” trick.
Press the Print Screen key on your keyboard (usually to the right of the F12 key, and usually abbreviated as PrtScrn or some other such thing). PrintScrn will copy your entire desktop – or both desktops if you have multiple monitors – onto the clipboard. On some keyboards, you’ll need to hold down the Shift key, and then press PrtScrn.
All that’s left is to paste the captured image into Paint, Paint.Net, Photoshop Elements or whatever, and save it as an image.
Okay, but that’s kind of involved… And there is a much easier way!
Starting with Windows Vista, Microsoft included a fabulous little tool called “Snipping Tool”. Unfortunately, they hid it far away from you so that you’d never find it, never learn to use it, and generally you’d have no idea it even existed. Which is lame.
So, the first step is to make a shortcut to the Snipping Tool on your taskbar:
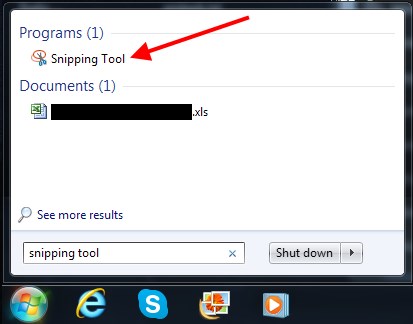
- Click Start
- Type: snipping tool
- Click and drag the program “Snipping Tool” down onto your taskbar
You should see this:
And after you have a link on the taskbar, you’ll see this:
![]()
Now, whenever you want to grab part of your screen, or your whole screen, just click the Snipping Tool icon on your taskbar. You’ll see this:
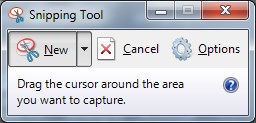
You’ll also have a mouse cursor that looks like crosshairs.
Just click and drag to make a box around the content you want to capture from your screen.
Let go of the mouse button, and poof! You get something like this:

Note that you can draw on the captured image, or write some text. You can also use the Eraser to remove stuff you drew on the image. Furthermore, you can save the image to different formats, e-mail the image to a friend or whatever, and the image is automatically copied to the clipboard if you want to use it in some kind of paint software.
Wasn’t that easy?
But wait – there’s more!
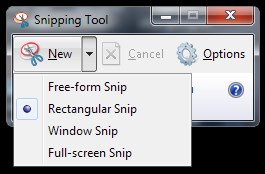
You can choose different selection modes, like so:
And there are a few very useful options to play around with (click the Options button):
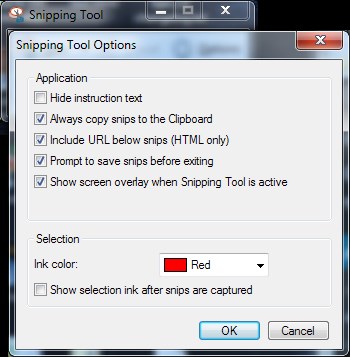
And there you have it. You can even change the ink color for drawing and annotating your captures.
All that sassiness built right in to Windows, and I’ll bet you never even knew it was there!

Great guide – I used Printscreen earlier, but now I’m using Clip2net – and think it is more convenient tool, if you need to get pics from your screen often.