One day, you turn on your laptop. Maybe no thing happens, or maybe you get some error message about fan speed, or maybe you just get a “system halted” message. Then again, perhaps your computer works just fine, but it’s starting to sound like a vacuum cleaner because the fans are running at full blast!
At this point, you may be inclined to freak out. But don’t go there just yet…
If this sounds familiar, it’s because you probably read my earlier post, How to Clean the Inside of a Desktop Computer. This edition is specifically for laptops.
Usually, cleaning the fan and heat sink inside your laptop is a lot easier than you might think.
With a few dollars and a bit of bravery, you can “dust” inside your laptop (without taking it apart, hopefully) even if you don’t know anything about how computers work.
If you can dust your house, you can dust your lappy!
Tools You Will Need
You will definitely need a can of “compressed air”, otherwise known as an “air duster”, “air squirter”, etc. You can buy them pretty much anywhere, and they look like this:

DO NOT use a vacuum cleaner – bad idea (static electricity). Use an air duster!
Note: The air duster can will become very cold as you spray. This is normal. If it seems to run out of gas, put the can somewhere warm and use the 2nd can you bought. Once the 1st can warms up, it will once again have “spray power”.
Right, so that was easy. Now you’re ready to carry on.
Locating the Vents on Your Laptop
All laptops have an air input, and an air output. Cool air is sucked in somewhere, and the heated air is expelled somewhere else. Now, if you have some fancy new-fangled laptop, it may have vents that are very well hidden. For example, sometimes manufacturers (especially Fruity ones) hide the vents underneath the keyboard, or they disguise them as a thin and supposedly esthetically-pleasing slot or something.
In any case, it is a simple fact that computers produce heat as they run, and all computers must remove that heat from their innards, and channel it elsewhere to avoid overheating and either damage or shutdown.
There are some fanless laptops, but they are usually far less powerful than a normal laptop. Usually, they channel heat away from their internal components by using convection (natural air flow – no fan) or by using the the laptop case itself as a heat sink – especially if it’s made from something “fancy” like aluminum.
In any case, if your laptop is making noise, it’s got a fan. And if it’s got a fan, it has vents. So, find the vents on your lappy. The following are some examples of where to find cooling vents on laptops:
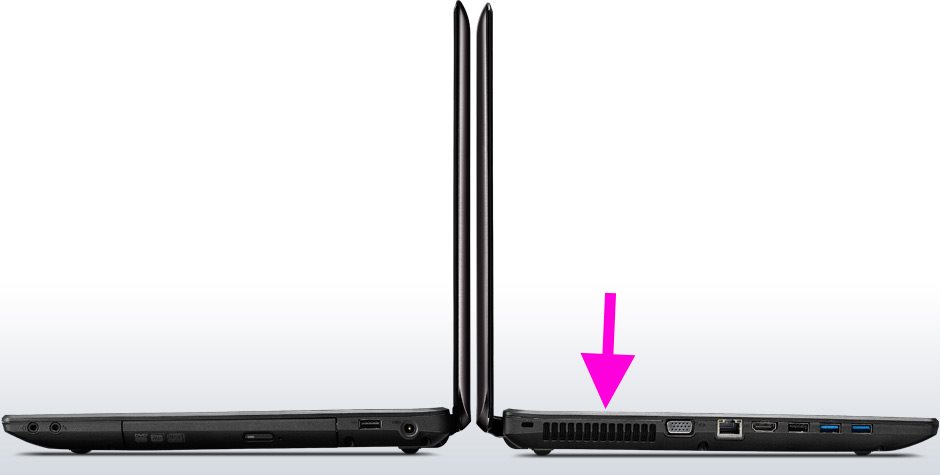
Side Vent
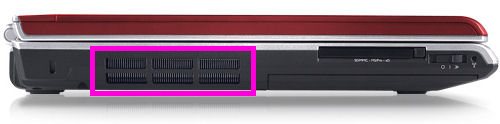
Another Side Vent

Rear Vent
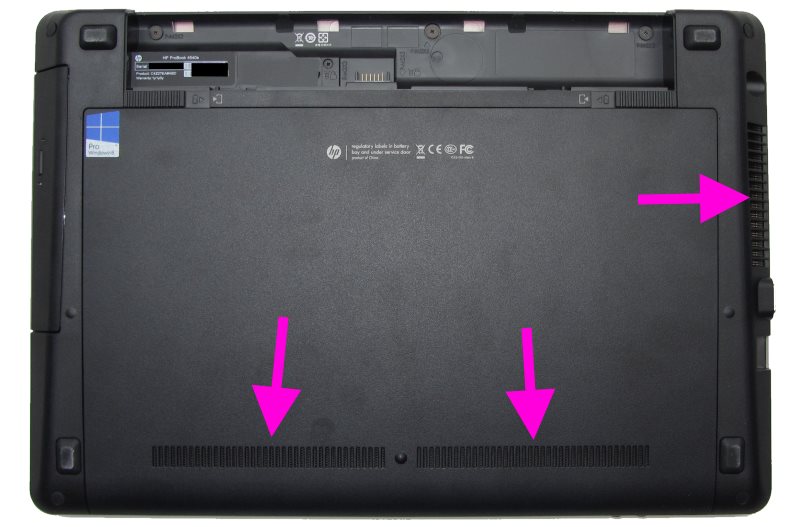
Bottom Vents + Side Vent
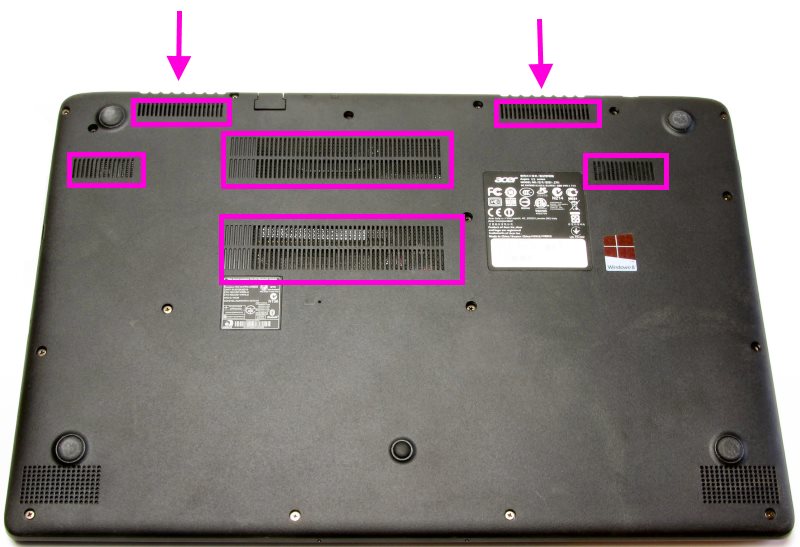
Bottoms Vents + 2 Rear Vents
Well, as you can see, vents can be everywhere! Normally, the one you are most concerned with is the Side Vent, and/or any Rear Vents.
You can see which Side or Rear Vent is important because you’ll be able to see a (usually) copper heat sink just inside the vent, like so:
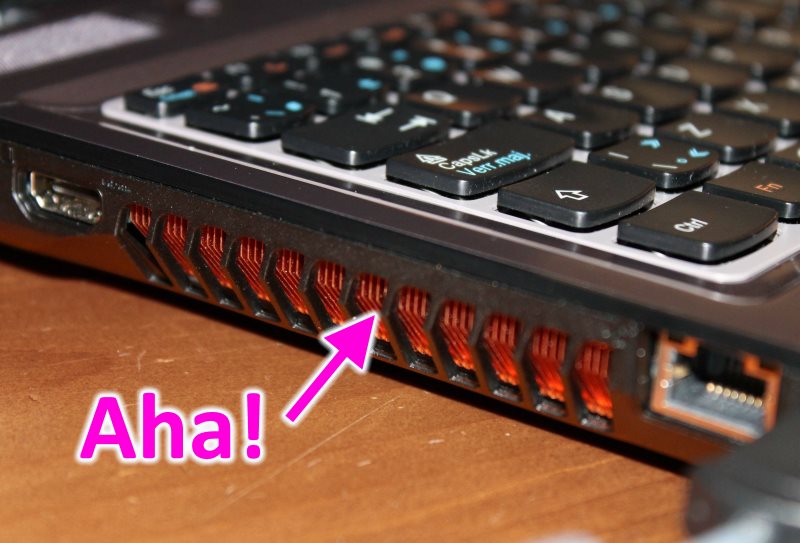
Side Vent – Copper heat sink is clearly visible
The vent with the metal fins inside is the most important one to clean!
The Cleaning Process
Here’s what you do:
- Turn OFF your laptop
- Using your air can, spray into the vent with the copper heat sink. Give it a good blast or two or three, and watch as all kinds of dust comes shooting out. You may hear a “whining” noise as the fan spins up. That’s okay, as long as the computer is off (which you did in Step #1, right?)
- Next, spray into all the other vents on the laptop: bottom, rear, side, etc.
You’re done. Wasn’t that easy? Now, fire up the laptop. It will probably run much quieter, cooler, and you’ll be a happy camper.
I usually do this on my laptop every 6 months or so. If you live in a dusty, smoky, or pet-hair-saturated environment, do it more often.
It’s still noisy… What now?
Oh boy. What this probably means is that inside your lappy, you’ve got something like this:
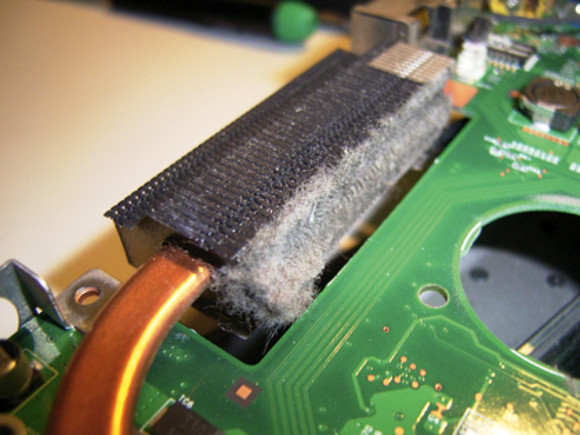
Clogged Heat Sink – BAD!
Note that in the above photo, all that grey fuzzy stuff is blocking the metal fins of the heat sink. That means no cooling, which means the fan will spin faster, and thus you have a vacuum cleaner instead of a laptop.
In the picture above, the cooling fan should be on the right where the hole in the green board is, but it has been removed. In the following photo, you can see inside another laptop, and the arrows show where to clean with your spray can:
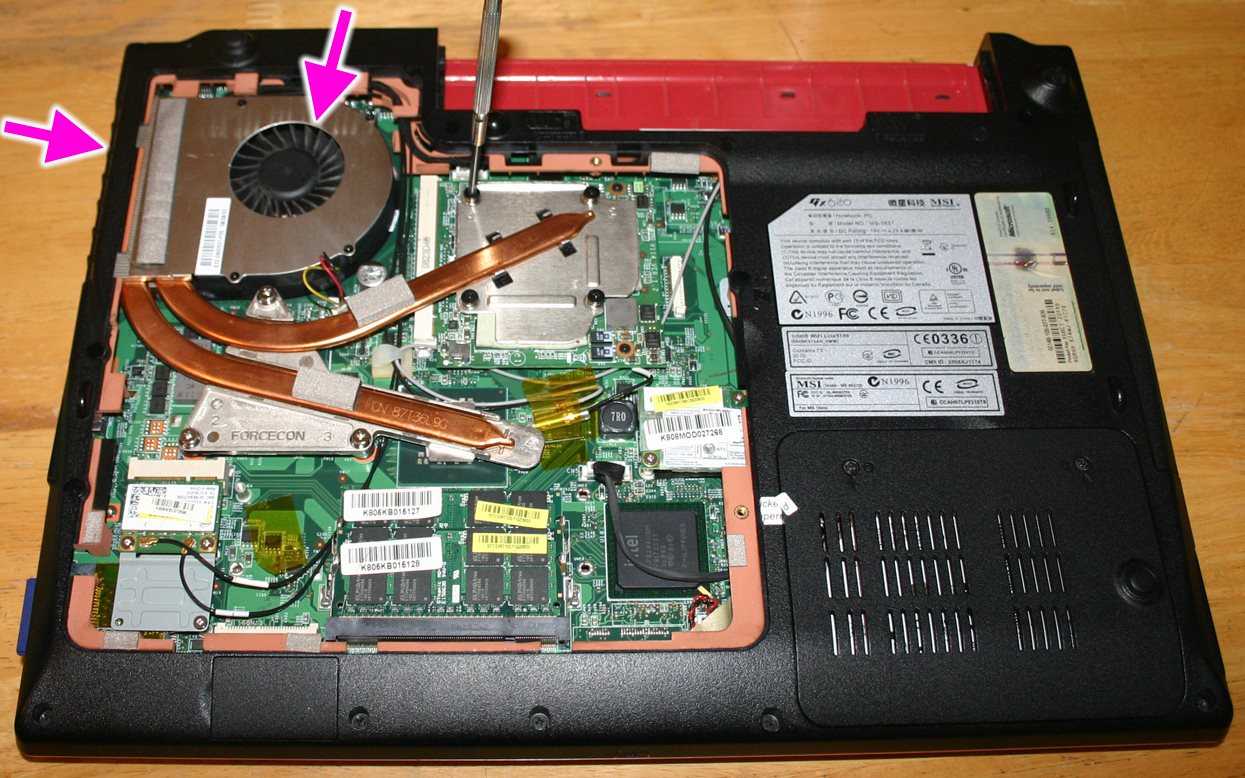
Spray here, and here
Now, if that still doesn’t work, you’ll have to remove the fan to clean the Grey Fuzzies from between the fan and the heatsink.
Of course, this level of operation is not for the faint of heart. But, for those of you with some mojo, you’re probably wondering how to open your laptop and clean it out thoroughly without damaging anything. Unfortunately, each lappy is different, and thus you need to find out exactly how to open things up if you want to avoid any major headaches!
The easiest way to do this is to go here: http://www.youtube.com
Just search for something like:
- [Your Laptop Model] disassembly
- [Your Laptop Model] replace fan
- [Your Laptop Model] replace heat sink
There are a ton of videos on this stuff out there, and someone has most certainly already done the hard investigative work for you. All you have to do is follow their instructions.
Fin (Ha!)
That’s it! Like I said, most of the time, all you’ll need to do is spray out the vents, all kinds of dust will come blasting out (probably in your face, which is nice), and you’re done. But, if things have reached Dust Factor 9, you will have to do some video searching, and be prepared to use a micro-screwdriver – or two.
If necessary, you can even order a replacement cooling fan on eBay, and replace it yourself. It sounds complicated, but with your YouTube instructions, it’s usually a piece of cake.
Good luck, and happy cleaning!


Recent Comments