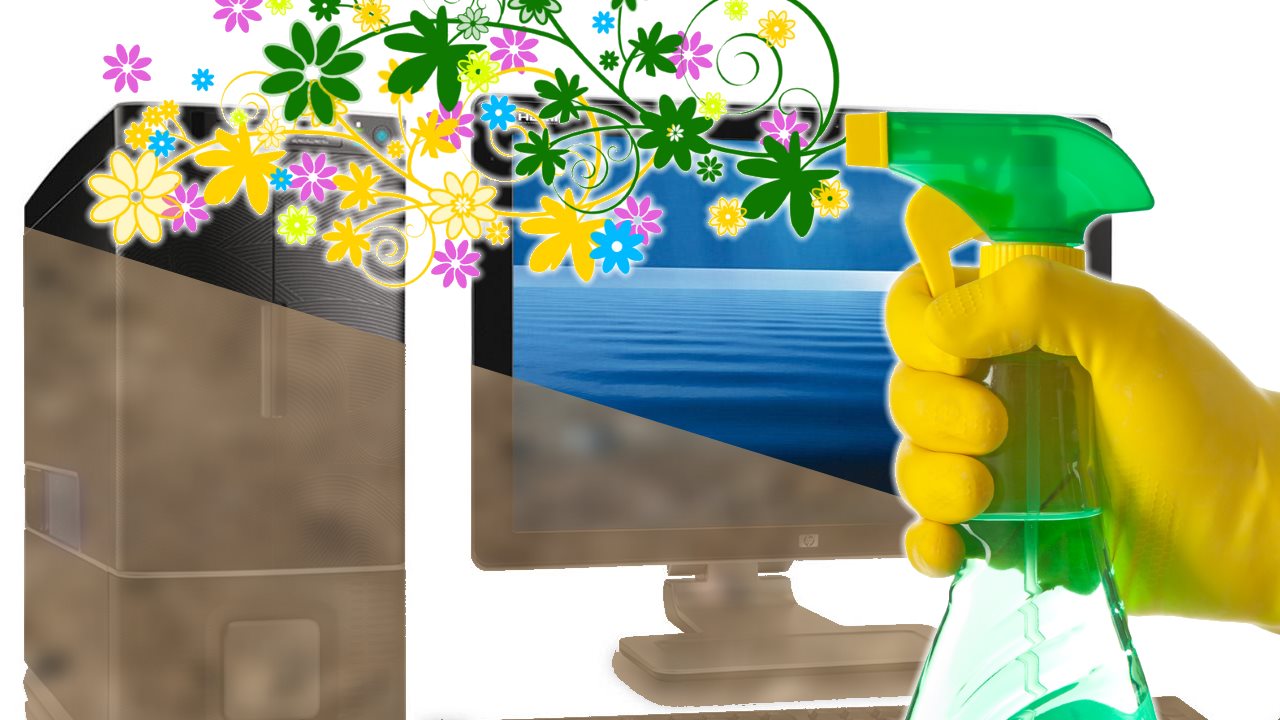
 One day, you turn on your computer. Maybe nothing happens, or maybe you get some error message about fan speed, or maybe you just get a “system halted” message. Then again, perhaps your computer works just fine, but it’s starting to sound like a jet engine because the fans are running at full blast!
At this point, you may be inclined to freak out. But don’t go there just yet…
There’s one thing most people don’t think about, and that is the fact that computers produce heat. Heat is bad for electronics, so the computer is cooled by heat sinks and fans. Fans and heat sinks get dirty, and eventually clogged. Oops!
With a few dollars and a bit of bravery, you can “dust” inside your computer even if you don’t know anything about how computers work.
If you can dust your house, you can dust your puter!
Tools You Will Need
You might need a screwdriver to open the case of your puter. You will also definitely need a can of “compressed air”, otherwise known as an “air duster”, “air squirter”, etc. Get 2 cans in case your puter is extra dusty inside. You can buy them pretty much anywhere, and they look like this:

DO NOT use a vacuum cleaner – bad idea (static electricity). Use an air duster!
Note: The air duster can will become very cold as you spray. This is normal. If it seems to run out of gas, put the can somewhere warm and use the 2nd can you bought. Once the 1st can warms up, it will once again have “spray power”.
Right, so that was easy. Now you’re ready to carry on.
Opening Your Computer
This part might seem terrifying, but it’s really not hard. First, shut down your puter. When it’s off, unplug the power cord from the back of the puter. Now you’re ready to open the side panel:
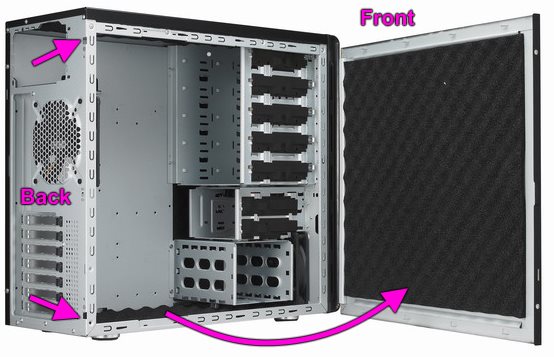 As you can see, with the back of the puter facing you, you’ll need to remove (usually) 2 thumbscrews or normal screws that hold the side panel onto the case. Once those are removed, simply remove the side panel as illustrated. If the panel doesn’t come off that way, try sliding it towards the back of the case first, and then remove as shown.
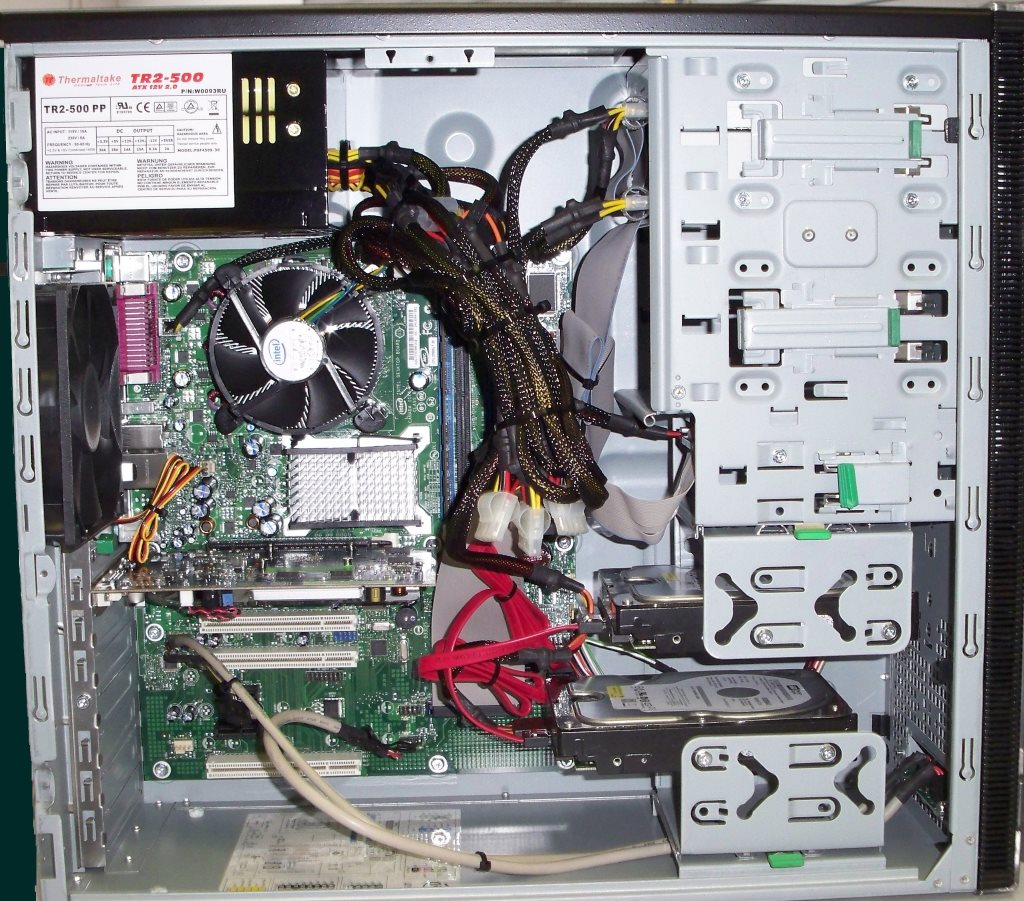
Of course, in the above photo, we see an empty computer. Your computer will actually look something like this inside:
If the site of the innards of your puter is giving you heart palpitations, take a deep breath. Then, look at the following photo, which illustrates the different parts of the puter:
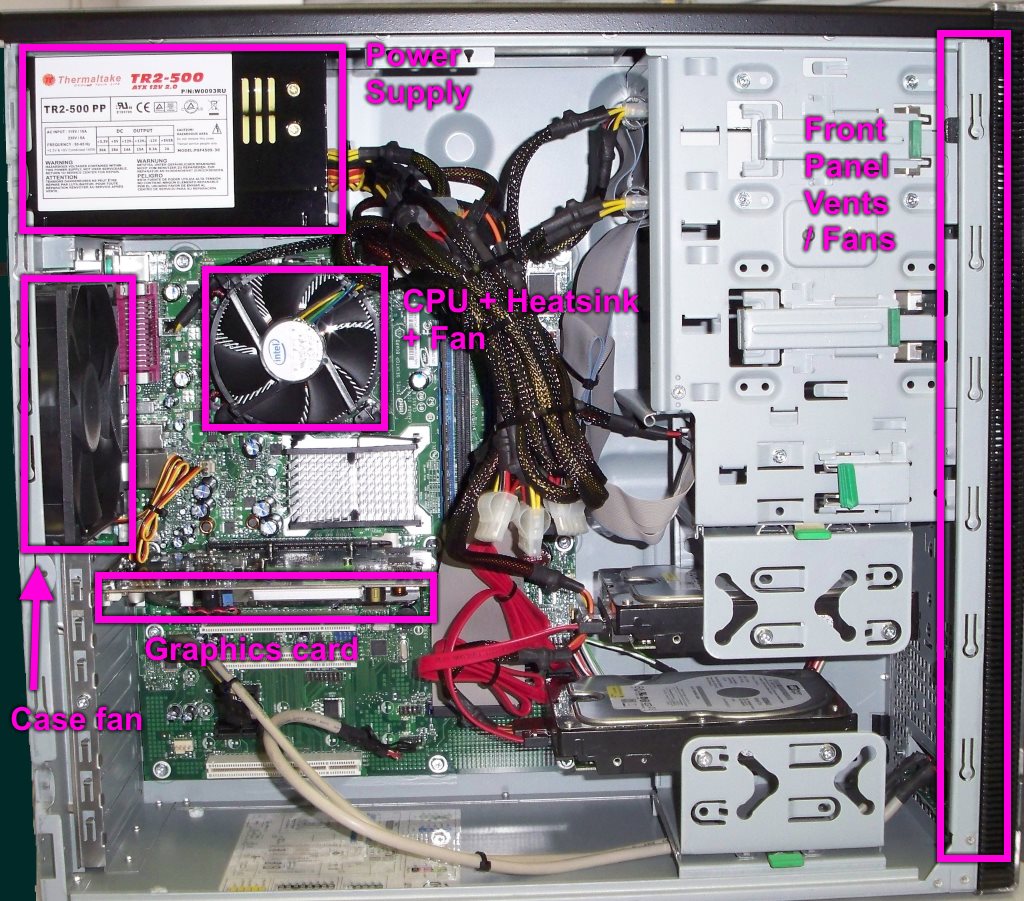
You can click each image for a larger version if needed. Each component that’s highlighted in a pink box is where you’ll need to dust. We’ll get there in a minute. But first, your puter may look a bit different. Another common configuration has the power supply at the bottom of the case, like so:
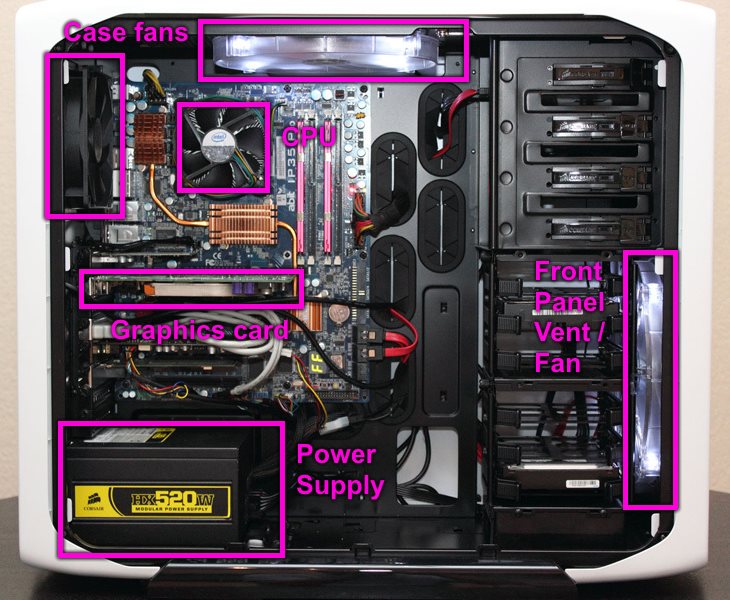
Also notice that in this second case (he-he), there are more case fans, which maintain high air flow through the puter when it’s running to help prevent overheating.
There may also be various plastic ducts inside for channeling air. If you need to remove these for cleaning, they are usually very easy to take out. Your PC manufacturer documentation should give some clue about how to do this if you should get stuck. If not, Google it!
Where and How to Dust
Now, you’re going to start dusting.
The most important components to spray with your air duster are the CPU heat sink and fan, any case fans, your graphics card fans/heat sinks (if present), and inside the power supply. So, let’s start here:
Spray off the areas indicated by the pink arrows!
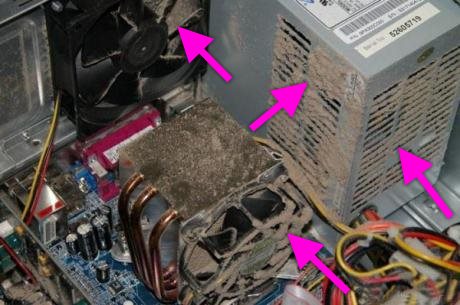
Here we see the CPU + heat sink + fan at the bottom, a case fan at the top left of the image, and the power supply at the top right of the pic. Spray all that dust off!!
Note that your power supply may have only 1 vent, or possibly 1 large fan on the bottom. Wherever you see dust, spray away!
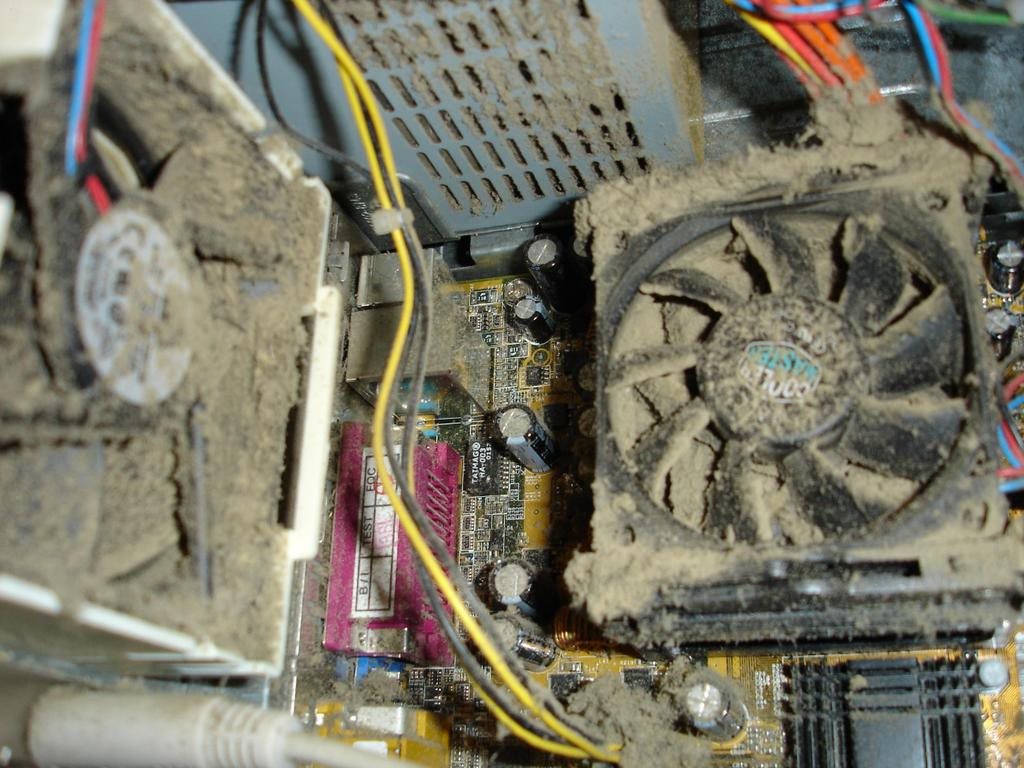
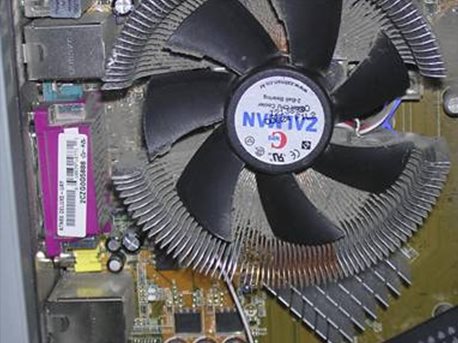
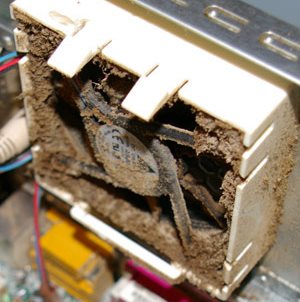
The following are a few examples of dusty CPU fans/heat sinks:
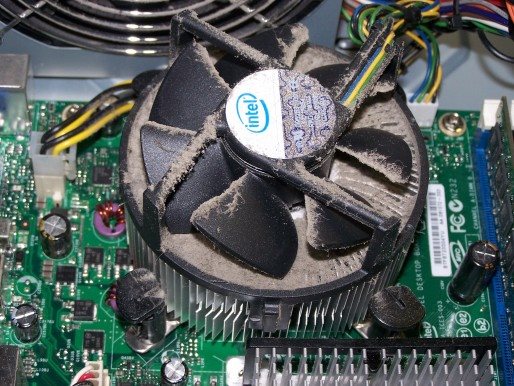
Obviously, with all that dust, the fan cannot circulate air over the fins of the heat sink, and your puter will overheat. Bad juju!
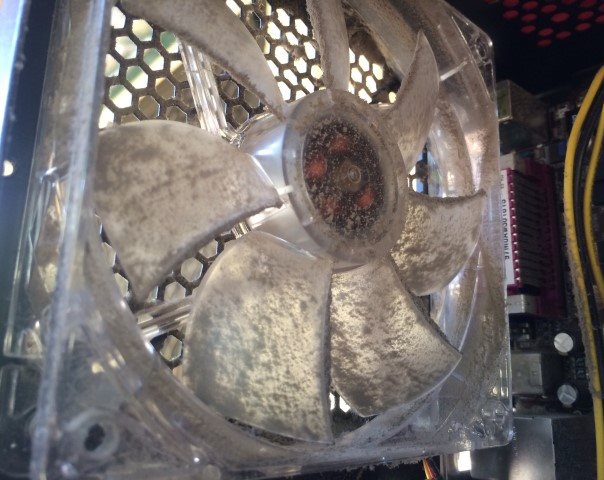
Here, we can see some dusty case fans, which also need cleaning:
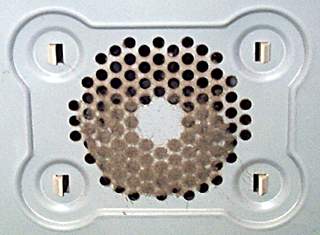
Also, be sure to use your air duster to spray out any vents on the back of your case, like this:
And of course you should also use your air duster to clean off any case fans and vents on the front panel of your case. Just look for dusty fans and vents, and wherever you see dust collected, spray away!!
The Results…
When you’re done, the inside of your puter should look more like this:

Nice and clean!!
That’s it.
Now you can put the side panel back on the puter, screw ‘er down, plug your puter back in, and fire her up!
Final Bits and Bobs
It’s important to perform cleanings like this on a regular basis. I usually do it about twice a year. It really depends on where you use your computer, though. If it’s used in a dusty and/or smoky environment, you should clean it out more frequently. If you have pets, watch out for fur! Some puter cases also have plastic mesh filters (usually in the front panel) which you can remove and clean.
In any case, if the fans are trying to push air over hot metal heat sink fins that are totally clogged with dust, components like the processor (CPU) will heat up. When that happens, the fan will start to spin faster and faster in a useless attempt to keep the processor cool. But, all that usually happens is that it makes the already clogged heat sink even more dusty and clogged. Oops.
So, do your puter and yourself a favor, and clean house a couple of times a year. Your desktop will last longer and be much happier, and so will you!


Doesn’t the dust just get kicked back into the room, or in your eyes and lungs?
Yeah, which is why I usually do it outside!