 With fiber internet, ultra-high download speeds are pushing the envelope in terms of home routers.
While 1 Gbps Ethernet used to be enough, many ISPs are offering 2Gbps speeds – and up!
Unfortunately, your standard home router these days usually only offers a single 2.5 Gbps multigig Ethernet port – and sometimes NO 2.5 GbE ports at all.
So what do you do if you need multiple 2.5 gig Ethernet ports?
Why, you roll your own router, of course! It’s a lot easier than it seems…
Why Fi?
As regular viewers of my videos know, I’m not a big fan of WiFi.
If you’re curious, you can watch my vid 5G is just the tip of the iceberg. Or you can learn how to easily wire your house for internet.
But the bottom line is that if you do want WiFi, just pick a mini-PC that has WiFi.
Just understand that even with the latest WiFi standards, you rarely get even close to 1 Gbps speeds, and you can forget about 2.5 Gbps!!
So I strongly recommend going wired just for the raw speed and latency alone. But, I digress…
What you need for a multigig router
This part is really simple: you need to buy an Intel-based x86 mini-PC with 4 or more 2.5G multigig Ethernet ports… And then install OpenWrt on it.
 There are quite a few Intel-based models out there with various processors. I recommend the N100 processor since it’s Alder Lake, quad-core, and only 6W.
Sure, you can make do with an older Celeron-based model. But if you’re gonna go hardcore, then for Pete’s sake go all the way.
I can tell you that with an N100, you can load balance two 2 Gbps down / 1 Gbps up fiber connections, and the thing barely even sweats. My current load numbers: 0.00, 0.00, 0.00
YIKES!!! That’s powerful. It’s also passively cooled, so it’s quiet and runs at a frigid 40°C under normal usage! With 2 symmetric 1 Gbps net connections, it’s 38°C. Keep in mind that these days, 1 Gbps Ethernet is super energy efficient, but multi-gig and 10G Ethernet chips generate more heat.
Many people are under the impression that you need a supercomputer to route multigig connections. No, you really don’t. You DO need more than most commercial routers out there, but not Deep Blue or anything.
Here are a few examples of mini-PCs you might want to consider (affiliate links):
- MR-M1 Mini PC N100 DDR5, 16GB LPDDR5 512GB NVMe SSD, 4 LAN 2.5GbE
- Fanless N100 Industrial Mini PC, 4 * 2.5Gbe i225 LAN Ports POE, 8GB DDR4 RAM, 128GB SATA SSD
- Fanless Mini PC Intel N100 Quad Core, 4 Intel 2.5GbE I226-V LAN, 8GB DDR5 RAM 128GB SSD
I personally like the last one since it has the I226-V Intel 2.5GbE chip, which seems to work out of the box with modern Ubuntu and OpenWrt 23.05.5. Nice!
In any case, the mini-PC will set you back almost $300. Most come with 8GB of RAM and a 128GB NVMe SSD. In my case, the RAM was a Samsung stick, and the SSD was a 256GB no-name brand. I replaced the SSD with a SanDisk 250GB NVMe drive that’s pretty zippy, but relatively low-power at about 5W.
You may also want to upgrade any Ethernet switches you have to a 2.5GbE version. If you’re in Europe, grab a KeepLiNK 8-port 2.5GbE switch or two. For N. America, try this one: MokerLink 8 Port 2.5G Ethernet Switch with 10G SFP+
Yes, they’re all Made in China. The simple fact of the matter is that no Western manufacturer can build and sell the dang things for less than $140 – for reasons I don’t quite entirely understand. The KeepLiNK model is perfectly reliable and very fast!
Installing OpenWrt on x86
 And now, the moment you’ve probably been dreading: Installing OpenWrt on your x86 mini-PC!
The reason you’re freaking out is because everyone tells you it’s difficult, complicated, not fully compatible, yadda yadda.
Fortunately, none of that is true!
In fact, the whole process was amazingly painless for me…
This is what you need to do:
- Go here: https://firmware-selector.openwrt.org/
- Leave the version pulldown at the latest (23.05.5 at the time of writing)
- Enter Model: x86
- Choose Generic x86/64
- Click: Customize installed packages and/or first boot script
- In the text box of packages, add any and all packages that you would normally add to OpenWrt after an install/upgrade. So for example, if you need load balancing and SQM, you might do:
luci-ssl mwan3 luci-app-mwan3 iptables-nft ip6tables-nft luci-app-sqm collectd conntrackd nano
- Then click the Request Build button, and wait…
- When the build is done, click the button COMBINED-EFI (EXT4) to download your fully-customized image
- Plug in a screen, keyboard, and mouse to your mini-PC
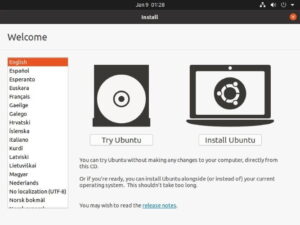
- Now boot your mini-PC from a USB stick running the latest Ubuntu Desktop
- Choose to “Try Ubuntu” to use it as a “live CD”
- Copy the OpenWrt image you downloaded earlier onto a USB stick or SD card, and plug that into the mini-PC, too
- In Ubuntu, go find your OpenWrt image, and unzip it. You can also do: gunzip openwrt-*.img.gz
- To find the name of your NVMe SSD, in a terminal window, type: lsblk. Most likely it will be /dev/nvme0n1
- Next, you need to write the image file to your NVMe drive. In the terminal from the directory where your OpenWrt .img file is, do this:
dd if=openwrt-23.05.5-XXXXXXXXXXXX-x86-64-generic-ext4-combined-efi.img bs=1M of=/dev/nvme0n1
- When it’s done, disconnect everything (esp. USB sticks)
- Connect the mini-PC Ethernet port #0 to your puter, and port #1 to your internet/modem.
- Reboot your mini-PC into OpenWrt
- Go to //192.168.1.1 in your web browser, log in and configure OpenWrt like usual!!
If you need further help, there is an OpenWrt guide to installing on x86.
That’s literally it. You can now use LuCI to configure everything – and enjoy your 2.5Gbps Ethernet speeds on all ports!!
What about resizing the partitions?
Many guides tell you to resize the main partition that the OpenWrt image creates. I highly recommend you do NOT do this.
The reason is pretty simple: It tends to mess things up pretty good.
What’s more, you don’t need tons of space for OpenWrt. My system almost never accesses the SSD because once it’s booted and running, it doesn’t need to. Disk usage is currently 32% (32MB out of 100MB), temp space is 1MB out of 4GB, and the boot partition is only 38% used.
If you need tons of storage space, see the OpenWrt guides in their Docs about adding internal SATA storage or an external USB drive.
What about upgrading to a newer version of OpenWrt?
That’s a good question. Unfortunately, they tell you not to do the usual sysupgrade method because it probably won’t work.
Fortunately, upgrading is as simple as:
- Make a backup of your config from current router (LuCI -> System -> Backup / Flash Firmware)
- Repeat the same procedure above with new OpenWrt image
- Restore your backup to the fresh image install
Yeah, that was easy.
Wrapping Up
So yeah, OpenWrt on x86 really isn’t that bad. If you want a real, honest-to-goodness multigig router, then grab a mini-PC and get crackin’.
On my own connections, speedtests now tell me I get upwards of 3000 Mbps as my fancy new multi-gig router load balances between both multi-gigabit fibers. When I had twin symmetric 1 Gbps connections, my download speeds went from 900 Mbps to 1800 Mbps.
Plus, the house network runs at 2.5 Gbps, so I can move files around at about 230 MB/s!
Pretty sassy!!! 🙂


Recent Comments