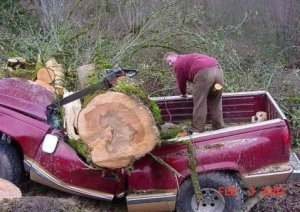
Never let children use a chainsaw!
Let’s face it: everyone loves chainsaws. A chainsaw can make very short work of any trees, bushes, or branches that happen to be causing a problem. I have even seen a small chainsaw skillfully used in place of a large circular saw for home remodeling – no electricity required! They are seriously handy devices.
The one problem with chainsaws is that they require maintenance. In fact, they require a lot of maintenance in order to perform optimally. A lot of “service” shops really don’t do a very good job of taking care of saws. If you can find a service shop with an old guy who still uses files to sharpen chains, then you have discovered a true gem!
For the rest of us, you can save some bucks – and have a lot of fun – by servicing your chainsaw yourself.
Obviously, there are a lot of different types of chainsaws out there. As such, it would be kind of hard to tell you exactly how to service your particular model. But, they all work in pretty much the same way. In any case, if you want to properly service your chainsaw, you’ll need the user’s manual that came with it. It will include certain technical details that will be essential. Fortunately, if you are one of those people who immediately ignores and then discards any and all instruction manuals, you can probably find the manual as a download on the manufacturer’s web site.
The things you will do most often are adding fuel and chain oil. Never forget to check the chain oil level every time you fill ‘er up with gas. The chain oil keeps the chain lubricated as it slides over the bar (blade) of the saw. If the saw doesn’t have enough chain oil, the friction between the chain and the bar will cause both to heat up. As we know, when things get hot, they expand. So, if you notice that your chain is becoming very loose and hot and even falling off the bar after several cuts, you need to check the chain oil level.
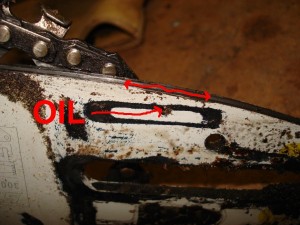
Another thing to check in the case of a loose, hot chain is the oil feed notch on the bar. To do this, remove the two nuts on the side that hold the bar onto the chainsaw.
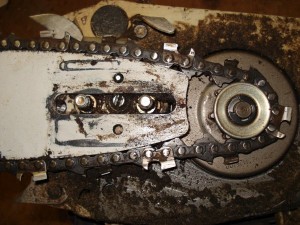
After removing the nuts, the cover over the sprocket that drives the chain should come off.
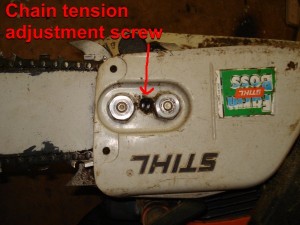
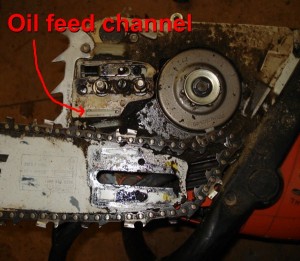
Loosen the chain (usually by turning a screw between the two big nuts holding the bar on), and then remove the chain. Remove the bar from the saw. Now, look at the end of the bar closest to the saw. There should be a small hole near the edge (one on each side of the bar) through which oil flows from the oil feed channel on the saw itself. Make sure that both the oil channel on the saw and the hole on the bar are free of dirt, sawdust, and other grime. In fact, clean out any sawdust and other muck that you find anywhere in the inner workings of the saw.
Note that if you clean out the chain oil path and the chain is still overheating, you may have a broken oil pump. Generally, the oil pump isn’t exactly easy to get to, and a professional servicing is probably a good idea unless you’re feeling really brave! If the chain IS getting oil and it’s still heating up, you may have a bent bar (replace it!) or a bar with a worn chain groove (flip the bar over, or replace it).
Replace the bar and chain on the chainsaw, and set the proper chain tension with the chain tension screw. The chain should lift easily off the bar, but not be too loose and floppy. If the chain is too loose, it will fall off the bar while you are cutting. If it’s too tight, it will cause the motor to stall and/or damage the chain.
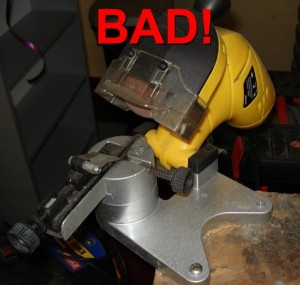
Now that the chain will be well-lubricated, you should make sure it’s nice and sharp. I highly recommend sharpening the chain yourself with a file. If you take it in someplace to have it sharpened, the shop will most likely use a motorized grinding wheel like this one:
Chain sharpeners like the above make sharpening chains very easy. Unfortunately, they are not what the pros use. I have a friend who is a professional “tree man” – the kind that swings around like Tarzan in trees using a climbing harness. He told me that one should never use a grinding wheel like the one above for two main reasons. The first reason is that the grinding wheel cuts an angled notch in the chain tooth instead of a nice sharp curve. This reduces the cutting effectiveness of the teeth on the chain. The second reason is that it’s very easy to grind away the cutting teeth very quickly with a motorized grinder. In short, your chains will last a lot longer and cut better for a longer time between sharpenings if you use a good old fashioned chain file.
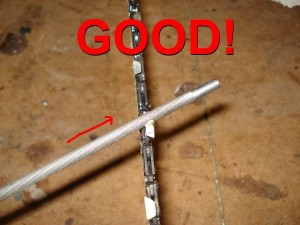
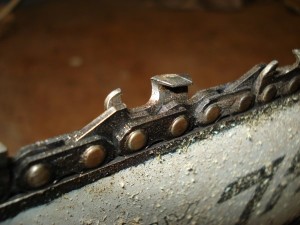
To sharpen the chain, go to a shop near you and bring a chain along to make sure you get a file of the size. File each tooth in one direction only, 2-3 swipes. Do NOT use a lot of pressure. Just let the file do its job. The angle of the file can be seen below. What you can’t see is the angle in the vertical direction. If you simply place the file next to one of the teeth on the chain, you can easily see exactly what angle to use. When you are done filing one of the teeth, it should have a nice rounded, very sharp edge on the side of the tooth, and a sharp angled top edge.
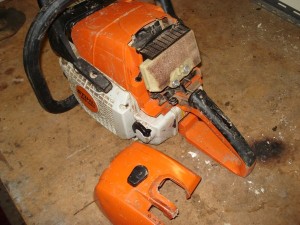
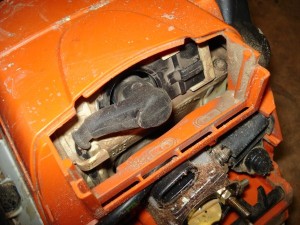
Next, you need to clean and possibly replace the air filter. In our example saw, you can see how to get at the air filter below:
That’s one dirty filter! Chainsaws make lots of sawdust and wood shavings, and they will quickly clog up the air filter. This will result in dramatically reduced cutting power and efficiency, and possibly even a stalling motor. Remove the filter, clean it well with mild soap and water, and then let it dry before reinstalling it on the saw.
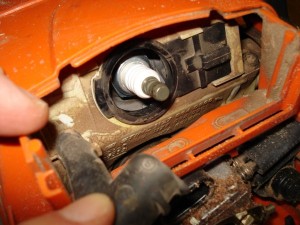
In the chainsaw pictured, the spark plug is located just above and behind the air filter.
Pull off the spark plug cable, and use a socket wrench to loosen the old spark plug.
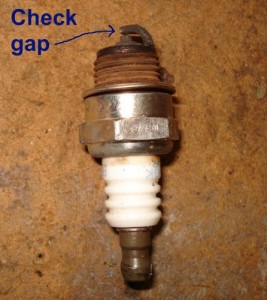
If the plug is black and dirty, you can clean it with a wire brush. I recommend just changing the plug, which should be done anyway at least once a year. Spark plugs are cheap! Before installing the new plug, you should check in your user manual and find the proper gap (the air space between the two electrodes at the end of the plug).
Once you have the proper gap, use a spark plug gapping tool to measure the gap and gently bend the metal “arm” towards or away from the center electrode until the gap is set properly. You can find a spark plug gap tool at any auto parts store.
When installing the new, propperly gapped plug, hand thread and tighten the spark plug until you can’t turn it anymore. Then use a socket wrench or torque wrench to finish tightening the plug. If you don’t have a torque wrench, tighten the new plug to about the same tightness as when you removed the old plug. You shouldn’t use anywhere near all your strength to tighten a plug. It should be tight and snug, but not overtightened! I normally just use a socket wrench with a deep socket set.
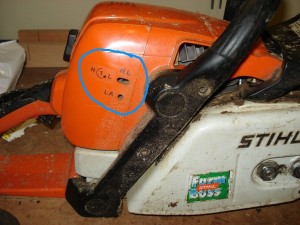
Finally, put the saw back together. Now you may need your user manual again to get the proper settings for the carburator. On our example chainsaw, there are three screws on the side of the saw labeled “H”, “L”, and “LA”.
Chances are, you won’t have to adjust the carburator screws at all. However, if after performing all the maintenance above, you need to make some adjustments if your saw has any of the following problems:
- Motor stalls when idling
- Too little power when cutting at full throttle
- Motor spews smoke or runs roughly in general
- When idling, the chain moves on the bar
To readjust the carburator for this particular chainsaw, the process is as follows:
- Tighten (turn clockwise) H and L screws all the way in
- Loosen (turn counter-clockwise) H and L screws one full turn each
- If the chain moves on the bar when the motor is idling, turn the LA screw clockwise until the chain stops moving; then turn the screw back counter-clockwise 1/4 turn
The H and L screws adjust the high and low engine speed by changing the fuel/air mixture. The LA screw is more commonly known as the “idle screw” – simply put, it adjusts the idle speed. If the motor continues to stall, you may need to adjust the L screw, and then again adjust the idle screw. You may also need to adjust both the H and L screws if you are using a different quality of gasoline.
Generally speaking, 2-cycle engines in gasoline-powered yard tools are used with the lowest octane gasoline available. In the USA, this is about 87 octane. In the EU, regular unleaded is more like 92 octane. If you use higher octane gasoline in a saw set for 87 octane fuel, the saw will lack power and probably spew smoke because the fuel/air mixture is too rich. The reason for this little problem is that octane is a measure of “bang” per given amount of fuel. At 87 octane, the carburator is set to allow a set amount of fuel in for a given amount of air. When you put, say, 92 octane fuel in, the carburator gives you the same amount of fuel as before, and the same amount of air. But more “bang” in the higher octane fuel means that the you actually need less fuel to generate the same amount of power. Thus, you should adjust the carburator to give a leaner mixture, or less fuel for the same amount of air.
While manufacturers will tell you not to use fuels with an octane rating other than what is recommended, I have seen chainsaws and string trimmers run just fine for years on a different octane fuel – as long as the carburator was adjusted properly!
Well, I’d say that about wraps it up. Now you should have a pretty good idea of how to service your chainsaw, as well as numerous other machines with 2-cycle engines! For very little money and a bit of time, you can keep your equipment running like new AND impress everyone with your savoir faire!
SAFETY WARNING: Always wear safetly glasses and ear plugs when using a chainsaw. Ripstop pants are also a good idea!



Thanks for the education on chainsaws, I’ll se if I can pick up a file at home depot….
George
Good article,Scootie. Thank you,from. From Casey.