 Okay, I admit: I was quite reluctant to try out the “new” File History backup system in Windows 10.
In fact, just a few months ago in my article Windows Backup and Restore failed: Four fixes that work, I wrote:
I suppose you could just be using File History, but that’s a different type of backup. Personally, I still use Backup and Restore because it works exactly the way I want.
Well, that’s not really true anymore.
In fact, Backup and Restore crapped out on me again, and this time I was unable to fix it!
So I decided to try File History, and whattaya know: it totally rocks!
What’s the deal with File History?
In short, File History works similarly to the Windows 7-era Backup and Restore, but it’s a bit different.
You attach a backup hard drive, fire up File History, choose the extra folders you’d like to back up, and it works in the background.
Unlike Backup and Restore, File History doesn’t bomb for 1 million different reasons. It also has an option to automagically remove older backups to make room for new ones, a feature which Backup and Restore was sorely lacking.
Best of all, by default File History backs up files (or more likely any changes that have been made to your files) every hour. And it doesn’t slow your puter down at all.
Once the initial backup is done, File History will incrementally back up only changes to your files, which keeps it zippy.
If you happen to disconnect your external backup drive, don’t worry! File History will save a copy of your backup data on your puter, and automatically sync the backup data to your external drive once you reconnect it.
It’s quite fancy.
How to set up File History
Okeydokey, first of all, you’ll need to connect preferably an external backup drive, like this one:
Seagate Backup Plus Slim 2TB Portable External Hard Drive USB 3.0

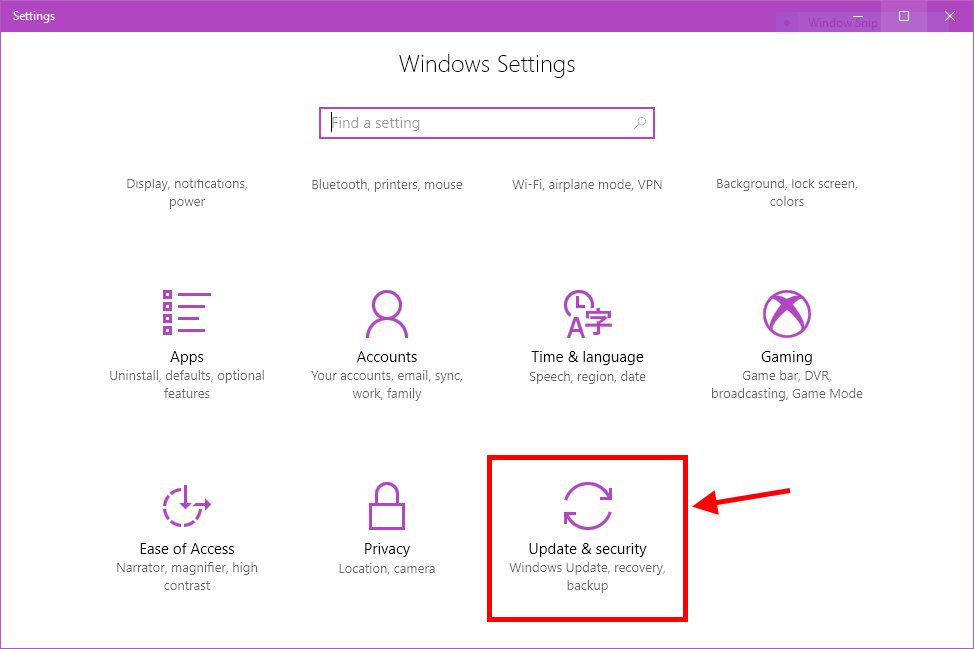
Once that’s done, click Start (windows logo) -> Settings (gear icon).
Next, click on Update & security:
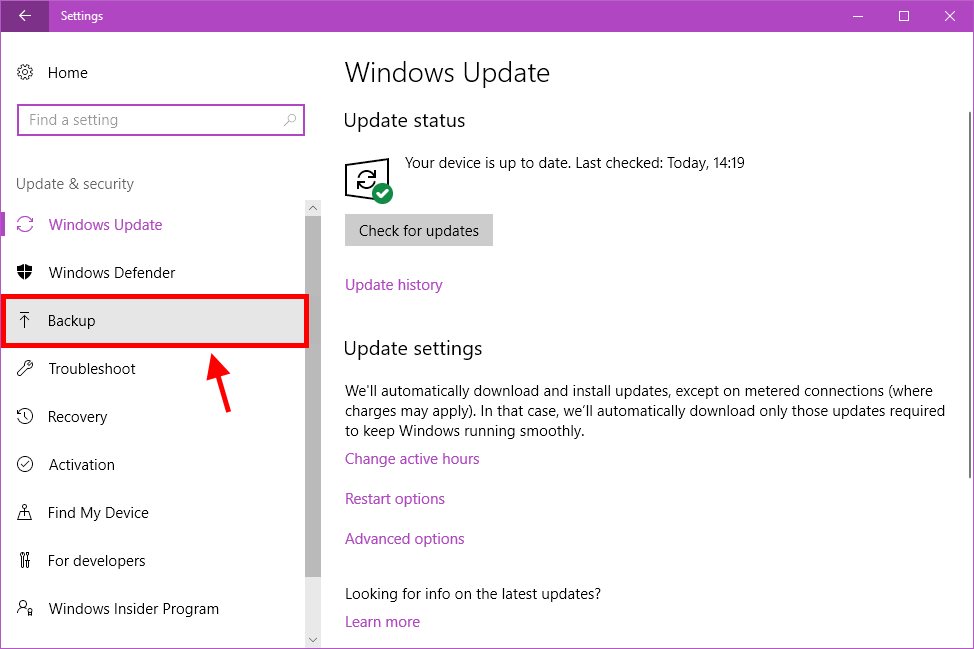
On the next screen, click Backup in the left column:
You should now see the Backup settings. Connect your backup hard drive, and then click Add a drive:
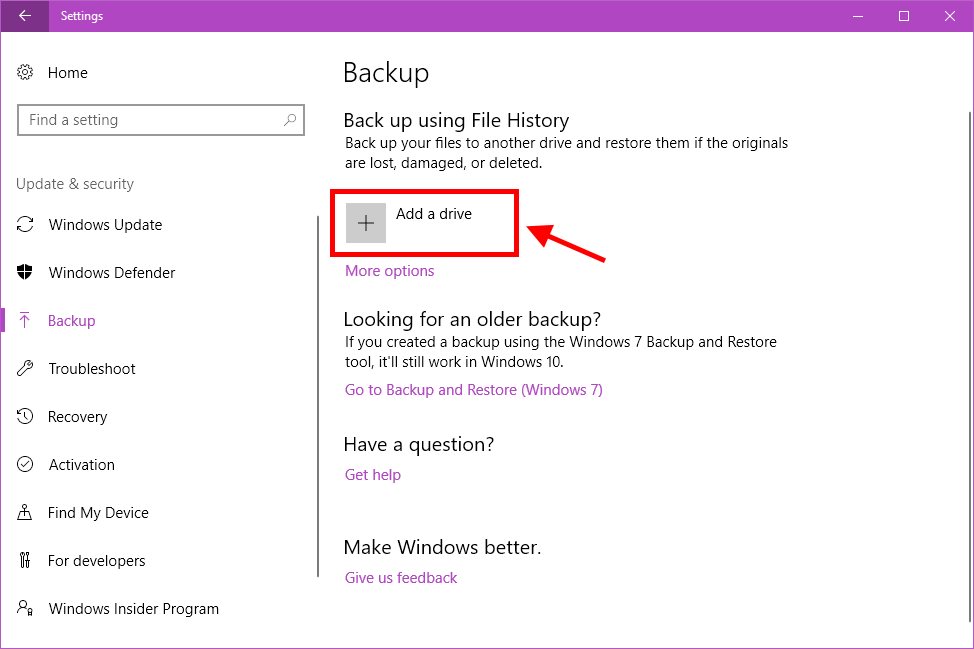
You’ll need to click on your backup drive on the left side when the list of possible drives/backup locations pops up.
File History is now enabled. You should then see the following screen, where you’ll want to click the More options link:

There are a few options you should set on the Backup options screen.
First, make sure Back up my files is set to Every hour (default).
Then, change Keep my backups to Until space is needed:
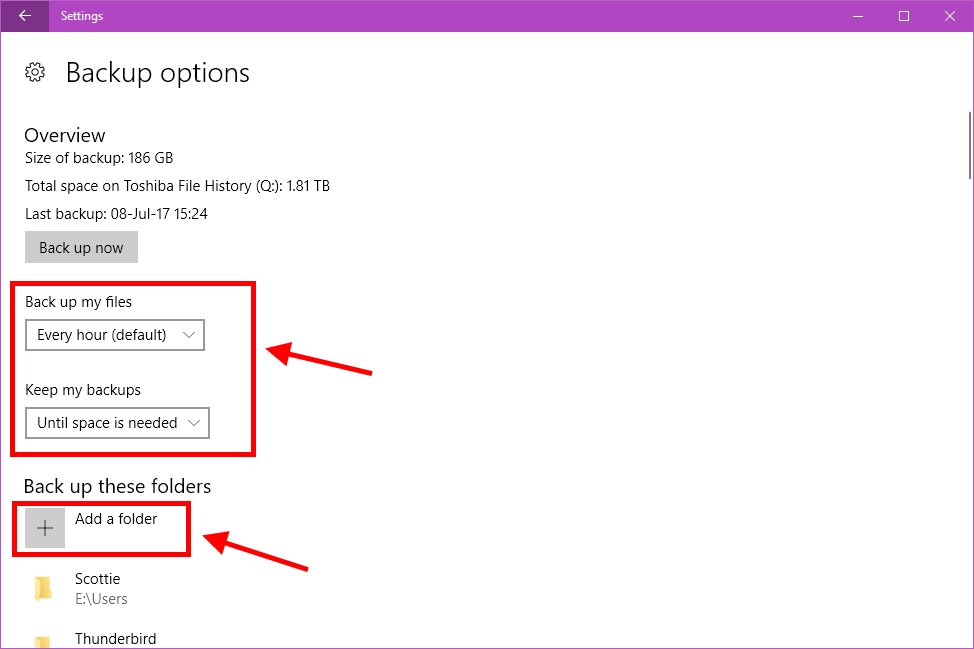
The last thing you might want to do is click the Add a folder button.
By default, File History will back up your standard libraries: Documents, Music, Pictures, Video, etc.
But if you have any other files or folders you’d like to include in your automatic backup, just click the Add a folder button and add each one.
Also, if you’d like to exclude any files or folders from the backup, scroll down and click the second Add a folder button that’s under Exclude these folders, like so:

That’s it!
If you’d like, you can scroll back up to the top and click the Back up now button. Otherwise, just close the Settings window, and File History will take care of everything.
Your files and folders will be backed up every hour without any intervention on your part. If your backup drive runs out of space, olders backups will be removed automagically to make room for new ones.
If you ever need to restore a backup, just connect your backup drive and you’ll see the Restore files from a current backup at the bottom of the Backup options screen.
Doesn’t get much easier than that!


Trackbacks/Pingbacks