 Note: To resize a single image to a particular pixel size, see: How to Easily Resize and Crop a Single Image in Windows
There is one little problem I see a lot: How does one resize a bunch of images in order to post them online somewhere, or to send in an e-mail, or whatever?
Of course, most online services and social networking sites will automagically resize and compress your images for you.
That’s nice, but if you’re one of those people who don’t have fiber-to-the-home (FTTH) or some other uber-high-bandwidth net connection, it’s really handy to be able to create smaller versions of your 20 megapixel photos before you upload them.
Fortunately, it turns out that there is a really easy and completely free way to do it!
Okay, first of all, I’m assuming your using Windows.
Second, I’m assuming you have Windows Live Photo Gallery installed. To see if you have this free Microsoft software, click the Start button and type “photo”. If you see Windows Live Photo Gallery (also called Windows Photo Gallery), click it to launch the program.
If you do not see it, head on over to the following site and download the installer. You can also install other parts of Windows Essentials 2012 if you’d like. Here’s the link:
http://windows.microsoft.com/en-us/windows-live/photo-gallery
Now that it’s installed, you have a fabulous little piece of software to organize, view, and even touch up your collection of photos and other images. Launch the program as described above.
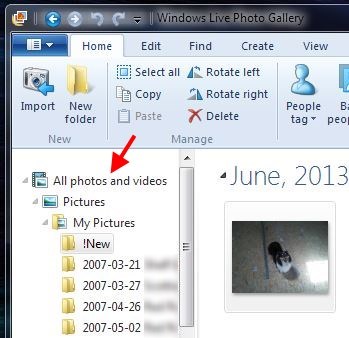
The first step is to find your images in the left pane of Photo Gallery:
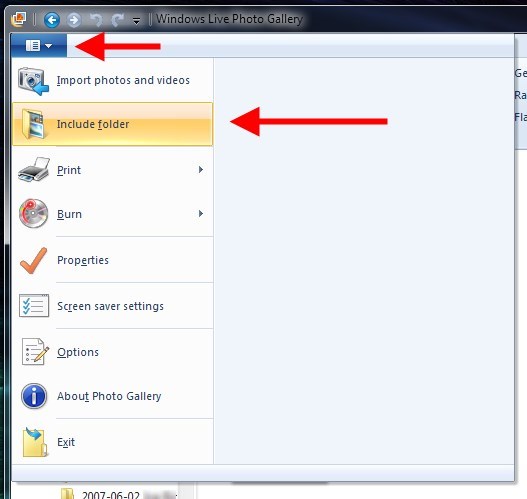
If they’re not listed, you can add the folder where they are located to your Pictures Library. For example, I often have some pics on my Desktop, and I’d like to add my Desktop so that any images there will appear in Photo Gallery. Just click the blue button in the top left corner of Photo Gallery, and then select “Include folder”, like so:
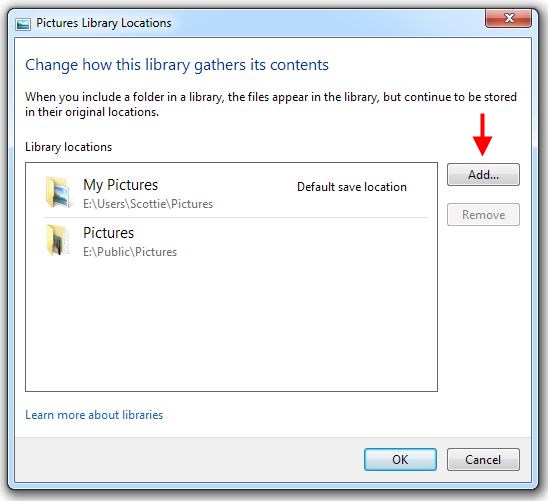
This will bring up the Pictures Library Locations window. You can click the Add button, choose the Desktop folder/icon, and then click the “Include Folder” button, like so:
Right. Now look in the left pane of Photo Gallery again, and you should see Desktop listed. Click the Desktop folder to see all the images:

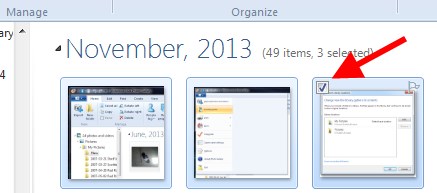
Now in the main pane, select each image you’d like to resize by hovering over it and clicking the checkbox. This allows you to select multiple images.
Now right-click anywhere on one of the selected images, and choose “Resize…”. This will bring up the Resize window. Here you can select a size (measured by the resized image width in pixels), then click the “Browser…” button to choose where you want to save the resized images, and then just click the “Resize and Save” button.
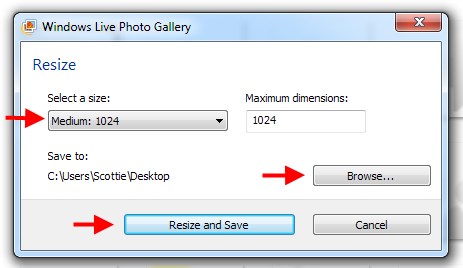
Photo Gallery will then take each image you selected, resize it to the specified size, and save it to your “Save to:” folder. In my case, I saved the resized images to the Desktop.
That’s it! Now you have resized pics that you can upload, share, or whatever. Note that the original images are preserved, so when you’re done, you can safely delete the resized pics.
Well, that’s handy, but what if you want to e-mail some large photos you took to a friend? That’s even easier.
Just find the photos anywhere (in a folder, on your Desktop, etc.), select them all, right-click on one of the selected images, and choose “Send to -> Mail recipient”
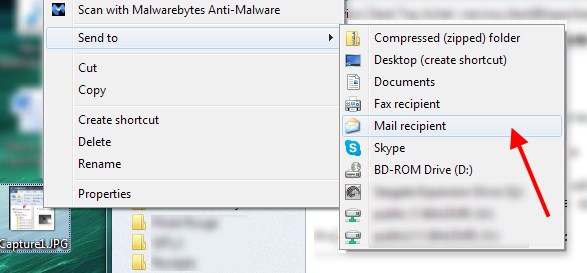
This will open a similar Resize box like Photo Gallery, and when you’re done choosing the image size, Windows will resize them all, open your default e-mail application, and attach the images for you. Pretty handy, yes?
Note that the “Send to -> Mail recipient” trick does not require Windows Photo Gallery to be installed; it’s built in to Windows.
Well, there you have it. Hopefully this will make your life a bit easier, and it’s completely free!


From your description I would assume that Picasa (the free program, not the online service) is a more comfortable way. JPG-compression (80-90 % quality I would recommend) and size can be easily controlled on exporting pictures. Picasa is running on Linux, too. The latter could be interesting if the cubox-i becomes an success. I see the desktop in a transition from Windows zu Linux/Android and try to use software that runs on all of these OS.
Personally I don’t really like Picasa. Also, I’ve seen many machines with Photo Gallery pre-installed, which makes things easier for the “less technically inclined”. It’s more of an “it just works” kind of thing that is there, but that people just don’t know about. But, in the end, whatever works!
I need 1280 x 450. What does “medium 1024” mean? This is NOT helpful. Why is it so difficult just to resize something?? I am using a PC and I want my MAC back.
For that, you’d need to try something like this:
How to Easily Resize and Crop a Single Image in Windows
This should work if everything in Windows works as it should, but just selecting multiple photos and right click will CRASH the Live PHOTO Gallery.
Wow!
Thanks so much — worked perfectly for me.
It was very helpful and super easy. Thank you!
Hi. You can use a free online tool to resize image https://freetools.site/image-editors/resize